At a glance
Half the pelargoniums in British gardens are killed by the same two things: being put out too early in spring, and being left out too late in autumn. They look tough. They’re not. One decent frost and whatever you spent at the garden centre is compost. Get the timing right and they’ll flower from late May until October without much complaint. Get it wrong once and you’ll understand why the timing matters.
The other thing worth saying upfront is the name. Pelargoniums are not geraniums. True geraniums are hardy perennials that survive winter without any help and come back every year. Pelargoniums are from South Africa and cannot survive frost. The confusion has been around for centuries at this point and nobody is going to fix it, but if you call them geraniums at a specialist nursery you’ll get a certain look. More practically, it matters because hardy geraniums and pelargoniums need completely different treatment in autumn, and confusing them is how plants die.
Which type do you want
Four types dominate in UK gardens, and they’re different enough that it’s worth knowing which you’ve got.
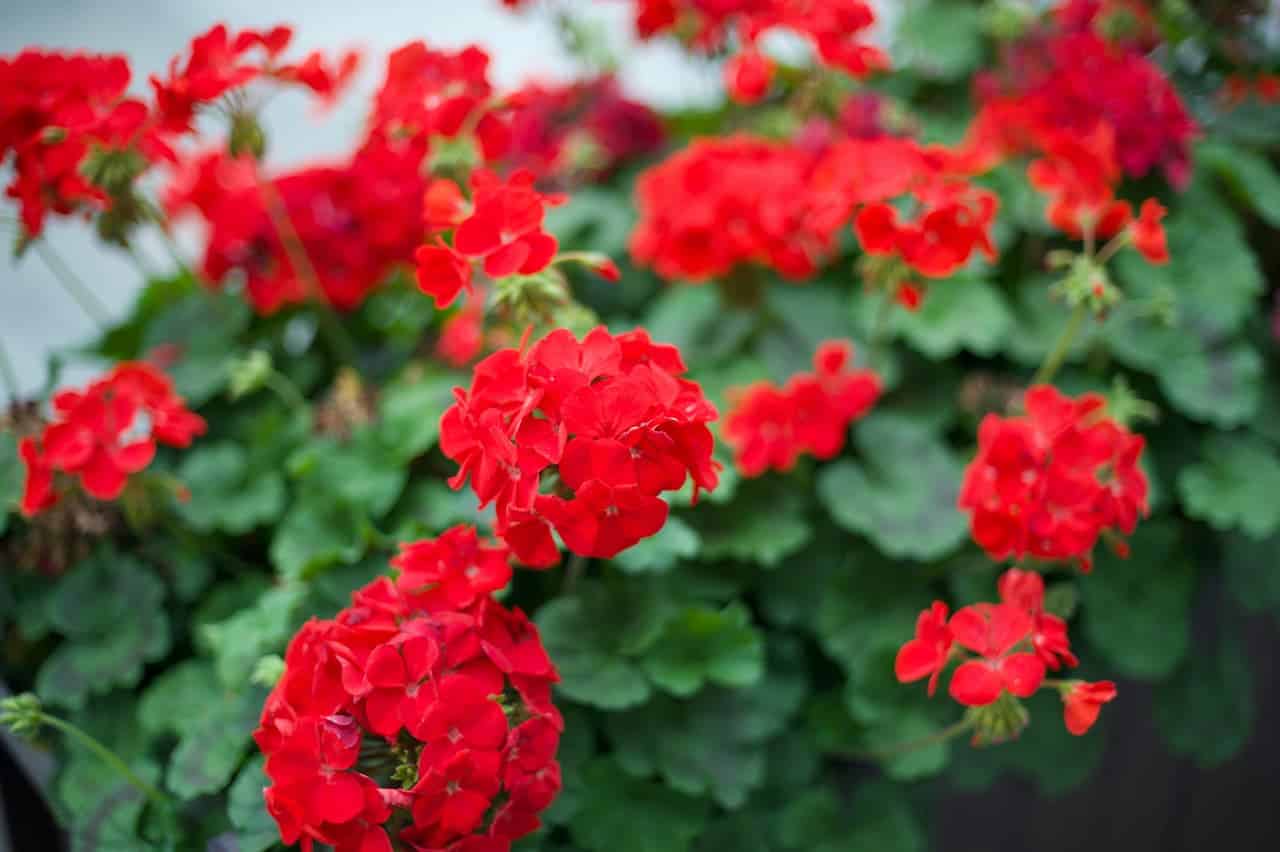
Zonal pelargoniums are the standard bedding type: upright, busy, with round leaves that usually have a darker horseshoe marking. They flower from May until the first frost, which in a mild year can mean November. Single and semi-double varieties outperform double-flowered ones outdoors; the double blooms trap moisture and rot in British summers. Zonals are forgiving, adaptable, and the right choice if you want something that will get on with it.
Ivy-leaved pelargoniums trail to around 90cm and are the best choice for hanging baskets and wall containers. They’re more tolerant of wind than zonals and shed rain better. If you’ve got an exposed position, ivy-leaved are the ones to try. The flowers are smaller but they carry on for months.
Regal pelargoniums are the showiest of the group: large, ruffled flowers in deep purples, mauve, and pink. The catch is the season. Regals flower for eight to ten weeks rather than all summer, and they need shelter from rain and wind to perform well. They’re better suited to a conservatory or a very sheltered patio. They also prefer partial shade during the hottest part of the day, which makes them the odd one out among the main types.
Scented-leaf pelargoniums are grown for their foliage rather than their flowers. Rub the leaves and you get rose, lemon, peppermint, or nutmeg, depending on the variety. They’re used in baking, in potpourri, and for flavouring sugar. Pelargonium graveolens is the rose-scented species; P. citronellum smells of lemon; P. tomentosum of peppermint. Flowers are modest. If scent is what you’re after, they’re worth growing. If you want something that looks spectacular in a pot, stick with zonals or ivies.
Start with zonals. They’re the most forgiving, they flower the longest, and they root from cuttings with a success rate that makes propagation feel like cheating.
Position and planting
Pelargoniums need full sun. Six hours minimum; more is better. Shade produces leggy growth and fewer flowers, and the plants sulk in a way that’s obvious within a week. Regals are the only type that tolerates partial shade, and even they want morning sun.
In containers, use peat-free multipurpose compost with extra grit or perlite added, roughly a quarter by volume. The drainage matters more than the compost brand. Pelargoniums are drought-tolerant but rot easily in waterlogged conditions, and standard multipurpose straight from the bag holds more moisture than they want. If you’re putting them in for more than one season, John Innes No. 2 gives better long-term structure. Never use garden soil in a pot. It compacts, goes anaerobic, and stays wet.
Pots need drainage holes, and the holes need to actually work. A layer of crocks or gravel at the base helps. If water isn’t running freely out of the bottom when you water, something is wrong.
For beds and borders, the soil needs to be free-draining and reasonably fertile. Heavy clay needs grit worked in. Waterlogged ground is not an option. Space zonal pelargoniums 25 to 30cm apart; ivy-leaved types need 30 to 35cm. Crowded plants get poor airflow and fungal problems follow.
The planting depth matters for one specific reason: the crown should sit at the same level as it sat in the original pot. Bury the stem and you’ve created the ideal conditions for blackleg to take hold within 48 hours. Set it at the right depth, water it in, and then let the compost dry before watering again.
Watering and feeding
The single most reliable way to kill a pelargonium is to keep it too wet. They evolved in South Africa in conditions that would make most British plants weep, and their roots genuinely prefer to be allowed to dry out between waterings.
In summer, water when the top of the compost is dry to the touch. In a hot spell that might mean every two or three days. In a cooler, wetter week it might mean not at all. What it never means is a fixed schedule regardless of conditions. Yellow leaves on an otherwise healthy plant are usually overwatering. Wilting with dry, crispy leaf edges is underwatering. The two are easy to confuse because both make plants look unhappy, but the treatment is opposite.
Water at the base, not overhead. Wet leaves in a British summer invite botrytis, especially on plants that are close together. Morning watering is better than evening; anything that doesn’t dry off before dark becomes a problem.
For feeding, the sequence matters. In spring, a balanced liquid fertiliser every ten to fourteen days supports leafy growth. Once flower buds appear, switch to a high-potash feed. Tomato fertiliser is exactly right and widely available. Feed fortnightly through summer. In autumn, reduce to monthly. Stop altogether if you’re letting the plant go dormant over winter.
Pelargoniums in containers need more feeding than those in the ground because nutrients wash out with watering. If a plant is growing but not flowering in midsummer and you’re sure it’s not in the wrong position, it’s usually either not being fed enough or not getting enough potash.
Deadheading and keeping them tidy
Pelargoniums that are deadheaded regularly flower better than those that aren’t. The plant wants to produce seed; remove the spent flowers and it has to keep producing new ones. It’s not complicated.
The method matters. Don’t just pull off the petals. Snap or cut the entire flower stem down to where it joins the main stem. Pull downward firmly and the stalk usually comes away cleanly. Leaving stem stubs in place invites rot and looks bad. On zonals and regals, the whole flower cluster comes off together. Deadhead every week or two through the season.
Pinching out growing tips in spring and early summer encourages bushy growth. Take an inch or two off each stem just above a leaf joint. The plant responds by producing side shoots. Skip this on mature plants that are already carrying buds, or you’ll delay flowering for the sake of tidiness.
During the season, remove any yellowing or dead leaves as you go. Pelargoniums shed older leaves naturally, but leaving them on the soil surface or piled against the stem is asking for disease.
Deadhead more often in wet weather. Damp, spent flower heads are a common entry point for botrytis. During a rainy spell, deadhead every few days rather than weekly.
Taking cuttings: the one job worth doing in August
August is the best month to take pelargonium cuttings in the UK. The plants are in active growth, stems are firm but not woody, and there’s enough warmth left in the season for roots to establish before autumn. Most cuttings taken now will be ready to overwinter by October, giving you free plants for next year from whatever you’re already growing.
Take a healthy, non-flowering stem around 10cm long. Cut just below a leaf joint, remove the lower leaves, and let the cut end sit out in the air for an hour. This letting-dry step matters. It helps prevent blackleg, which is the thing that kills most cuttings, and it’s the step most guides leave out.
Push the cutting into free-draining compost. A peat-free mix with extra grit is fine. You don’t need rooting hormone. Give it one light watering and then leave it alone until the compost surface is dry again. Put it somewhere bright but out of direct sun; 18 to 22 degrees is ideal. A south-facing windowsill works.
Don’t cover cuttings with a plastic bag. The trapped humidity causes stem rot, which is the opposite of what you’re trying to achieve. The internet is full of advice to do this for all cuttings. Ignore it for pelargoniums specifically.
Cuttings root in 14 to 21 days. Test by tugging gently; resistance means roots have formed. Once rooted, pot individually into 9cm pots and grow on a bright windowsill through winter.
Overwintering: the three options
Pelargoniums cannot survive UK winters outdoors. Temperatures below -1°C destroy the stems and roots, and most of the UK will see those temperatures somewhere between October and April. The question isn’t whether to bring them in. It’s which method suits your space.
Method one, active growth, needs a conservatory, a bright heated greenhouse, or a south-facing windowsill that stays frost-free. Cut the plant back by a third to a half in October, reduce watering, and feed monthly with a balanced fertiliser. In a mild winter with enough light, some will keep flowering. By February, new growth will be visible and you can start feeding fortnightly again.
Method two, dormant storage, works without a light source. Cut plants back hard to around 10cm in October. Move them somewhere frost-free and water very sparingly through winter, just enough to stop the roots drying out completely. In March, bring them somewhere warm and bright, start watering again, and they’ll put on new growth quickly.
Method three, bare-root storage, works best with plants that have developed woody stems. Before the first frosts, shake off as much compost as possible, let the plants dry for a day or two, then wrap the roots in newspaper and store somewhere cool, dry and frost-free. In spring, soak the roots in water for a few hours, pot up, cut the stems back to 10cm, and put them somewhere warm and bright. Not every plant will come through, so it’s worth taking cuttings as insurance before you try this method.
Problems: what actually goes wrong
Most problems with pelargoniums trace back to one of two causes: too much water or poor airflow. Solving those two things reduces the risk of almost everything else.
The table below covers the diseases and pests you’re most likely to encounter.
Bringing plants back out in spring
Don’t rush. The instinct after a long winter is to get plants outside the first week the sun comes out, and it costs people plants every April. Pelargoniums can be killed by a frost in May, and a cold spell in late April is not unusual anywhere in the UK.
For most of England, end of May is the safe point. Scotland and exposed northern areas should wait until June. Before putting them out permanently, harden them off over ten to fourteen days: bring them out on mild days, back in overnight, gradually increase exposure. Don’t skip this step after they’ve spent months inside. The shock of going from a warm windowsill to a north-easterly is significant.
Cut back any leggy winter growth in spring before the plant goes out. New growth from a pruned plant will be bushy and compact. A plant put outside without pruning will be tall, open, and more vulnerable to wind damage.
Share on socials: