At a glance
An allotment is one of the most rewarding things a gardener can take on – and one of the most common sources of frustration and abandonment when approached without realistic expectations. The waiting lists at most UK allotment sites are long, the anticipation is high and the reality of inheriting an overgrown, weedy plot in late spring can be genuinely deflating. The gardeners who thrive on allotments are not those with the most experience or the most time – they are the ones who start small, build good habits and resist the urge to do everything at once.
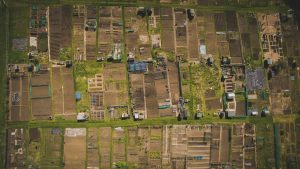
A standard UK allotment plot is 250 square metres – roughly the size of a doubles tennis court. That is a considerable area to manage, weed, sow, plant, water and harvest while also holding down a job and living a normal life. Starting with half or a quarter of the plot under cultivation in year one and expanding as confidence and systems develop is a far more successful approach than trying to grow everything everywhere from the start.
The first season – set realistic expectations
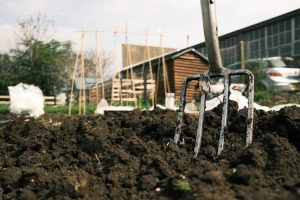
The first season on a new allotment plot should be viewed as a year of establishment, not a year of maximum productivity. The three main tasks of year one are clearing and controlling weeds, understanding the soil and its drainage patterns and establishing basic infrastructure. Any food produced is a bonus rather than the primary goal.
Do not rotovate a weed-infested allotment plot – it makes weeding dramatically worse. Rotovating a plot covered in perennial weeds like bindweed, ground elder, couch grass or horsetail chops the roots into hundreds of small fragments, each of which regrows into a new plant. The result is exponentially more weeds than you started with. The correct approach for an overgrown plot is either to cover with light-excluding membrane for a full season, or to dig by hand removing every root fragment you can find. Our guides on getting rid of bindweed and ground elder cover the specific approaches for common allotment weeds.
Plot planning and layout
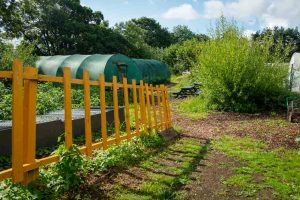
A simple plot plan on paper before doing anything saves enormous effort later. Key decisions include where paths will run, where raised beds will go, where a compost area will be sited, where a water collection point makes sense and which areas will be cultivated first.
Weed management
Weed control is the job that makes or breaks an allotment. A plot that gets ahead of you in June is very difficult to recover within a season. The most effective allotment weed management is preventive rather than remedial – keeping bare soil covered at all times either with crops, mulch or membrane.
Hoe weekly when dry – a sharp hoe used on a dry sunny day severs annual weed seedlings at the surface and leaves them to shrivel. Hoeing in wet conditions simply transplants seedlings. Keep hoe blades sharp. Mulch paths and plot edges heavily with a 10cm layer of bark chip – paths and edges are where weeds establish and then seed into beds. Never let weeds set seed – a single nettle or thistle allowed to flower and seed distributes hundreds of viable seeds across the plot.
Choosing the right crops
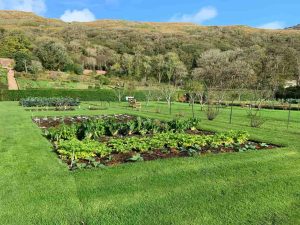
The most productive allotment crops for a beginner are not necessarily the most exciting ones. Prioritise crops that give high yields from small areas, are relatively simple to grow and produce something useful in your kitchen. Courgettes, French beans, salad leaves, beetroot, kale and chard all tick these boxes. Save the more demanding crops – celeriac, Florence fennel, extensive brassicas – for once basic systems are established.
The crops most worth growing on an allotment rather than buying are those where freshness makes a significant difference to quality. Sweetcorn, peas, courgettes, salad leaves, tomatoes and new potatoes all taste dramatically better within hours of harvest than they do after days in a supply chain and supermarket shelf.
Building soil fertility
Allotment soil varies enormously between sites – some plots have rich, well-cultivated soil built up over decades, others have thin, compacted or heavily weeded ground that needs years of improvement. In all cases the approach is the same: add large quantities of organic matter every year. Compost, well-rotted manure and green manures dug in annually build the soil biology and structure that makes growing easier every successive year.
Set up at least two compost bays from the start. Allotment growing generates enormous quantities of organic material – all of which should go back into the soil rather than being wasted. A two-bay system allows one bay to be filling while the other is maturing, giving a continuous supply of finished compost.
Allotment calendar overview
The allotment year follows a rhythm that becomes intuitive after two or three seasons. The busiest period is March through June, when sowing, planting and establishment all compete for time simultaneously. July and August are about maintaining, harvesting and keeping on top of weeds. September and October shift back to planting – winter crops, garlic, spring bulbs, bare-root planting toward the end of the month. November through February are planning, digging, structure maintenance and seed ordering.
The allotment is a long game. Year one is about clearing and understanding. Year two is about refining and expanding. Year three is when systems, soil improvement and accumulated knowledge start producing harvests that feel genuinely effortless. Stick with it through the difficult first season and the rewards compound significantly.
Share on socials: