At a glance
Tomatoes are the most popular home-grown vegetable in the UK and the one most likely to change how you think about what a tomato actually is. The difference between a vine-ripened garden tomato still warm from the sun and the refrigerated, gas-ripened specimens from a supermarket is dramatic enough that most people who grow their own successfully never go back to buying them. They are not the easiest crop to grow in the UK’s climate – they want more warmth and sun than Britain reliably provides – but with the right variety selection, a sunny sheltered spot and consistent management through the season, an excellent harvest is achievable in most UK gardens.
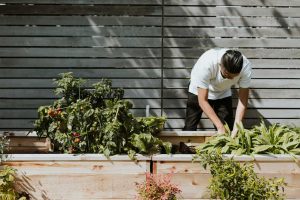
Growing tomatoes in a raised bed rather than directly in garden soil offers several meaningful advantages. The soil in a raised bed warms faster in spring than heavy garden soil – often several weeks faster – which matters enormously for a heat-hungry crop. Drainage is controllable, and poor drainage is a major cause of blight-encouraging conditions. The growing medium can be chosen specifically for tomatoes. And the contained environment makes feeding and watering more precise because the soil volume is defined.
Variety selection – the most important decision
Variety selection determines more about the outcome than any other single factor. The range of available tomato varieties is enormous and the differences between them are significant in terms of the conditions they need, how they grow and what results they produce. This is more true for tomatoes than almost any other vegetable.
The fundamental division is between cordon (indeterminate) varieties and bush (determinate) varieties. Cordon tomatoes grow as a single vertical stem that continues extending throughout the season, producing trusses of fruit at intervals. They require staking, regular pinching out of sideshoots to keep the plant to a single stem, and stopping in late July or August. They are more productive over a longer season but require more attention. Bush tomatoes grow to a fixed height determined by their genetics, produce all their fruit within a compact timeframe, and then stop. No pinching out of sideshoots is required, less staking is needed, and they are more manageable for first-time growers. The trade-off is a shorter harvest window and typically lower total yield than a well-managed cordon.
Within cordon varieties, cherry types produce large numbers of small, sweet fruits and tend to be the most reliable croppers in UK conditions because each fruit ripens fully even in a mediocre summer. Standard and beefsteak varieties produce fewer, larger fruits that require more heat to ripen and are generally more suited to greenhouse growing in the UK. For outdoor growing in the UK, choosing varieties specifically recommended for outdoor conditions is not merely a preference – it is a practical necessity. Many widely available varieties are bred for greenhouse cultivation and produce disappointing results outdoors.
Sowing indoors
Timing the sow correctly is where many new tomato growers go wrong. Sowing too early – in January or February – produces tall, spindly, light-starved plants by the time planting conditions arrive in May. A March-sown plant grown in strong spring light is frequently ahead of a January-sown plant by planting time. The correct window for most UK locations is late February to late March. In Scotland and the north of England, sowing in late March is appropriate. In the sheltered south, late February is workable if a heated propagator is available.
Growing on, potting up and hardening off
Once the first true leaves are well developed, pot on into 12 to 15 centimetre pots. Bury the stem deeper than it was growing – up to the base of the lowest leaves. Tomatoes produce roots along any buried stem section, producing a significantly larger root system. Continue potting on into progressively larger containers as roots fill each pot. By planting time the plant should be in at least a 2 to 3 litre pot.
Hardening off acclimatises greenhouse-grown plants to outdoor conditions before planting. Plants moved directly from indoors to an outdoor raised bed undergo severe shock from the combination of lower temperatures, wind, UV exposure and fluctuating conditions. Begin hardening off about 10 to 14 days before planned planting. Start with a few hours in a sheltered spot during the warmest part of a mild day. Increase outdoor time progressively over the following days. By the end of the period the plants should be spending full days outside and tolerating cool evenings. Skip this process and plants will sulk for weeks after planting, losing the start that the early sowing provided.
Preparing the raised bed and planting out
The soil in the raised bed needs to be right for tomatoes before planting. Tomatoes are heavy feeders that produce large quantities of fruit and require fertile, well-draining soil with good moisture retention. Dig in a generous amount of well-rotted garden compost before planting – at least a bucket per square metre, worked into the top 20 to 30 centimetres of the bed. See our raised bed soil mix recipe for a full blend. Avoid fresh manure, which drives lush leafy growth at the expense of fruit. Tomatoes prefer a slightly acidic to neutral soil pH of 6.0 to 6.8 – most garden compost and topsoil combinations fall within this range naturally.
Install support structures before planting – it is much harder to add them around established plants. For cordon varieties, vertical canes inserted at each planting position provide basic support. For a polytunnel or greenhouse raised bed, strings hanging from the roof structure with the tomato plant wound around the string as it grows is the professional growing method. Whatever support is used, ensure it can bear the eventual weight of a fully cropped plant.
Plant out after the last frost date and after completing hardening off. In the south of England this is typically late May. In the midlands and north, early to mid-June. In Scotland, mid-June to early July. The last frost date matters because tomato plants are frost-tender and even a light frost will damage or kill them. Plant spacing for cordon varieties is 45 to 60 centimetres. For bush varieties, 60 centimetres or more as they spread. Dig a hole deep enough to bury the plant up to its lowest leaves – this deep planting creates an extensive root system from the buried stem. Firm the soil, water thoroughly, and attach the main stem loosely to the support.
Watering, feeding and cordon management
Consistent watering is the single most important management task through the growing season. Inconsistent watering – allowing the soil to dry out then drenching it – is the primary cause of blossom end rot. This physiological disorder causes the base of developing fruit to turn black and rot. Despite appearing to be a deficiency symptom, it is not caused by lack of calcium in the soil but by the plant’s inability to move calcium effectively when water supply is irregular. Calcium moves in the transpiration stream and when that flow is disrupted by drought-then-flood cycles, calcium uptake stalls. The prevention is consistent regular watering that keeps soil at a steady moisture level. Inconsistent watering also causes fruit splitting: when a fruit develops a tough skin during a dry spell and then receives a large amount of water, the rapid expansion splits the skin.
Water deeply at the base of the plant – not over the foliage. A 10-litre can applied slowly to the base is far more effective than the same water scattered over the surface. Shallow surface watering encourages roots to stay near the surface, making them vulnerable to drying out quickly. Deep watering that reaches 20 to 30 centimetres encourages deep roots that access more stable moisture. In warm conditions tomatoes in a raised bed may need watering daily. In grow bags, twice daily in hot weather is not excessive.
During the vegetative phase before first flowers open, a balanced fertiliser supports root development. Once the first flowers appear, switch to a high-potash tomato fertiliser. Potassium is essential for fruit development – it controls sugar movement into developing fruit, contributes to flavour, and hardens cell walls. Apply weekly throughout the fruiting season. Magnesium deficiency shows as yellowing between leaf veins on older leaves, with the veins remaining green. It is common in heavily cropped tomatoes that have received high-potash fertiliser – potassium can inhibit magnesium uptake. Treat with Epsom salts (magnesium sulphate) dissolved at 15 grams per litre of water as a foliar spray applied to leaves every two to three weeks until symptoms resolve.
Cordon varieties require weekly sideshoot removal throughout the season. Sideshoots emerge in the leaf axils – the angle between the main stem and each leaf. Pinch them out when small, no longer than 2 to 3 centimetres, before they become woody. At this size they snap cleanly. Left until woody, they require cutting and leave a larger wound. In late July to early August, stop each cordon plant by pinching out the growing tip two to three leaves above the highest flower truss. This directs all remaining energy into ripening existing fruit rather than producing new growth that will not ripen before the UK growing season ends. In a warm southern English summer, four to six trusses can ripen outdoors. In a mediocre season or further north, four trusses is more realistic.
Blight – the biggest outdoor risk
Blight caused by Phytophthora infestans is the most significant threat to outdoor tomatoes in the UK. The same organism causes potato blight and both crops share the vulnerability. Good soil health and rotation reduce background disease pressure. Blight thrives in the warm, wet conditions of a British summer – specifically when temperatures are above 10 degrees Celsius and humidity is high for 48 hours or more. Under these conditions it can devastate an entire outdoor crop within a week of first appearance.
The first signs are brown patches on leaves, often with a pale yellow margin at the edge. These spread rapidly. Stems develop brown lesions and collapse. Fruit develops brown patches that rot to the core. Once blight is established it cannot be reversed – affected tissue must be removed immediately. If the whole plant is affected, remove and dispose of it away from the garden. Do not compost it.
Prevention is far more effective than treatment. Growing under some form of cover – an open-sided polytunnel, a lean-to greenhouse, or a clear plastic roof over the plants – dramatically reduces blight risk by keeping foliage dry. Blight spores spread through wet conditions and land on wet leaves. Keeping foliage dry disrupts this mechanism significantly. Choosing blight-resistant varieties such as Ferline, Crimson Crush, Fantasio and Mountain Magic provides meaningful additional protection. Removing the lower leaves progressively through the season improves air circulation at ground level where humidity is highest. Never remove more than a third of the foliage at any time. Never water overhead – always at the base of the plant.
Common problems
Blossom end rot cannot be cured once it appears in a fruit – affected fruits should be removed. Treat with calcium nitrate foliar spray applied to developing trusses and, critically, address the watering consistency that caused it. Magnesium deficiency responds well to a foliar spray of Epsom salts (magnesium sulphate) at 15 grams per litre, applied to the leaves every two to three weeks. Catfaced fruit is edible but misshapen and unattractive. Prevention is through not planting out until temperatures reliably stay above 12 degrees Celsius. Virus diseases causing mottled, distorted foliage have no cure – remove affected plants, control aphid populations on healthy plants, and wash hands and tools between plants to avoid mechanical spread.
Harvesting and end of season
Harvest when fully ripe – fully coloured for the variety and slightly soft when pressed. Vine-ripened tomatoes have significantly better flavour than those picked early and ripened indoors. Never refrigerate tomatoes – cold temperatures destroy the volatile compounds responsible for flavour. This is precisely what makes supermarket tomatoes taste bland compared to home-grown ones.
As the season ends in September and October, any green tomatoes on the vine will not ripen outdoors if temperatures have dropped below 10 degrees Celsius. Pick them and bring them indoors. Placing them in a paper bag with a ripe apple or banana speeds ripening by concentrating the ethylene gas that triggers the ripening process. Even indoor-ripened tomatoes are better used immediately than left to deteriorate on the vine outdoors.
After the final harvest, remove all plant material from the raised bed. Tomato plants carry blight spores and other disease organisms. Do not compost diseased material – bag and bin it. Healthy plant material with no visible disease can be composted. Clear the bed, add compost to replace what the heavy-feeding crop has consumed, and the bed is ready for the following season. Rotate tomatoes around the raised beds each year – do not grow them in the same bed in consecutive years. Soilborne diseases including blight, fusarium and verticillium persist in the soil and build up where the same crop is grown repeatedly. A three or four-year rotation significantly reduces disease pressure over time.
Raised bed vs grow bag vs pot
A raised bed in the sunniest available position typically outperforms a grow bag or pot in the same position because the larger soil volume provides more consistent growing conditions through the season’s variable weather. For greenhouse growing, grow bags are a practical and widely used choice with good results when managed attentively. The key advantage of grow bags is complete disease elimination each season by discarding the bag. The key disadvantage is the extremely high watering demand from the small soil volume.
Choose your variety before buying anything else. The right variety for your conditions – outdoor or greenhouse, cordon or bush, blight-resistant or standard – determines more about the outcome than any other single decision. A Gardener’s Delight in a well-prepared outdoor raised bed will outperform a greenhouse variety struggling in the same spot.
Share on socials: