At a glance
Asparagus is one of the most rewarding vegetables to grow on an allotment or in a raised bed, and one of the most misunderstood in terms of what it needs to produce well. It is a long-lived perennial – Asparagus officinalis – that establishes slowly, can produce abundantly for twenty years or more once mature, and requires a different approach to almost every other vegetable in the kitchen garden. The patience required in the first two or three years is consistently rewarded in every season that follows.
The asparagus crown – the root system planted rather than sown – is the foundation of the whole enterprise. Getting the bed right before planting is considerably more important than anything that happens afterwards. An asparagus bed planted this spring, in the right position, into properly prepared ground, will still be producing excellent spears in the 2040s. A bed planted carelessly, into waterlogged soil or ground full of perennial weeds, will disappoint within five years and be unmanageable within ten.
Choosing a site
Asparagus needs full sun – a minimum of six hours of direct sunlight daily during the growing season – and a deep, well-drained soil that does not sit wet in winter. Waterlogging is the single most common cause of asparagus crown death in UK gardens. The plant’s origins in coastal regions across Europe and western Asia explain its tolerance of sandy, free-draining soils and its vulnerability to persistently wet conditions. On heavy clay, raised beds are the practical solution: build the bed at least 30cm above the surrounding soil level, fill with a free-draining compost and topsoil mix, and asparagus will thrive in conditions that would otherwise be unsuitable.
The permanence of an asparagus bed makes aspect more critical than for any annual crop. The shading effects of fences, walls and neighbouring trees that seem minor at planting can become serious problems as those structures age over twenty years. Plant where the bed will have unobstructed sun from south-east through to south-west, and keep the bed at least five metres from any established tree or large shrub whose roots will compete. A bed 1.2 metres wide is a useful standard – it gives two rows of crowns and allows comfortable access for hand-weeding from either side without stepping on the crown zone.
Preparing the bed
Bed preparation is the most labour-intensive part of growing asparagus and the most consequential. Asparagus crowns are planted into ground that has been deeply worked, cleared of every piece of perennial weed root, and enriched with generous organic matter. Any perennial weed – bindweed, couch grass, ground elder, creeping thistle – that is not completely removed at this stage will be almost impossible to eliminate once the crowns are established. The close-spaced roots of a mature asparagus canopy make deep cultivation impossible without damage, and perennial weeds established between crowns cannot be removed without digging the whole bed up.
Dig the bed to a depth of 30cm, removing every piece of root. If the ground contains established bindweed or ground elder, the bed may need to be left covered in black polythene for a full growing season to starve out the weeds before any crowns go in. The extra year is genuinely worth it. Once the bed is clean, work in a generous application of well-rotted manure or compost – a full wheelbarrow per square metre is not excessive. Asparagus is a heavy feeder over its long productive life, and the organic matter added at bed preparation serves as the fertility foundation for the first several years. A handful of general-purpose fertiliser can also be incorporated at this stage.
On heavy or clay-based soils, the raised bed approach is more than a convenience – it is the difference between success and failure. Asparagus crowns planted into ground that drains slowly will survive their first summer but suffer cumulative waterlogging damage over successive winters. The crowns rot from the base and the plants die back gradually rather than suddenly, which means the problem is not obvious until the bed has already been weakened over several seasons. A raised bed built 30cm above the surrounding level, filled with a mix of topsoil and well-rotted compost, eliminates this risk entirely. The investment in materials and construction time is recovered in the first three or four years of good harvests.
Perennial weeds not cleared before planting will destroy the bed. Bindweed and ground elder established between asparagus crowns cannot be removed without digging the whole bed up. Take as long as needed to clear the site completely before the first crown goes in – one extra weed-clearing season is far less painful than losing a ten-year-old bed.
Varieties and planting
Asparagus is grown from crowns rather than seed. One-year-old crowns are preferred – they establish more readily, suffer less transplant shock, and produce plants that are as productive within three years as those from older crowns, which take longer to settle after the disturbance of lifting. Avoid any crowns that appear dried out or show softening or discolouration at the base, which indicates crown rot.
Male hybrids are the choice of most experienced growers. Male plants produce more and thicker spears than females – female plants divert energy into berry production, and the resulting self-sown seedlings gradually overcrowd the bed. Modern F1 hybrid varieties like Gijnlim and Backlim produce significantly higher yields than the traditional Connover’s Colossal and have largely replaced it in productive kitchen gardens.
Plant crowns in March or April, once the soil is workable and the worst of the spring frosts have passed. Dig a trench 20-25cm deep and 30cm wide. Create a low ridge of soil down the centre of the trench and drape each crown over the ridge with its roots spread on either side. Cover with 5-8cm of soil, leaving a slight depression that can be gradually filled in as the ferns grow through the season. Space crowns 30-45cm apart within the row, and allow 45cm between rows if planting multiple rows.
After planting, water well to settle the soil around the roots and apply a mulch of well-rotted compost or manure around the crowns – not over them. Keep the bed watered during dry spells in the first spring and summer, as the crowns need consistent moisture while establishing. Once the ferns are growing strongly, established asparagus is reasonably drought-tolerant, though watering in very dry summers helps maintain yield the following year.
The first three years
The most difficult aspect of growing asparagus for newcomers is the period before the first harvest. Crowns planted in spring will produce thin ferns in their first year – these must not be cut. In the second year slightly more ferns appear and again they must not be cut. Only in the third year after planting can a very light harvest be taken – a few spears per plant over no more than three to four weeks – and even this is a matter of debate among experienced growers, with some waiting until the fourth year to ensure the crowns build maximum root reserves.
The ferns that emerge and are left to develop through summer are doing essential work. They photosynthesize and send carbohydrates down to the root system, building the crown reserves that will fuel next year’s spear production. A large, vigorous fern top in summer means a productive crown at harvest time. Cut the ferns back only in autumn, once they have yellowed naturally – usually October or November in UK conditions. Cutting them back while still green removes the plant’s ability to continue building reserves for the following year.
In the first two years, the ferns will not be particularly impressive – thin stems perhaps 60-90cm tall that look nothing like the productive canopy that the bed will eventually develop. This is normal and not a sign that anything is wrong. By year three or four, well-established crowns begin producing the thick, tall fern growth that will characterise a mature bed. The ferns can reach 90-120cm in height in a good season and the canopy they produce does much of the weed suppression work for you. The bed essentially manages itself once established, requiring only the seasonal maintenance described below.
The two-year wait is not optional. Harvesting even a few spears in the first two years genuinely weakens the crowns and produces fewer, thinner spears for several subsequent seasons. The patience required in years one and two is the foundation of a productive bed that lasts twenty years. Resist the temptation.
Harvesting and aftercare
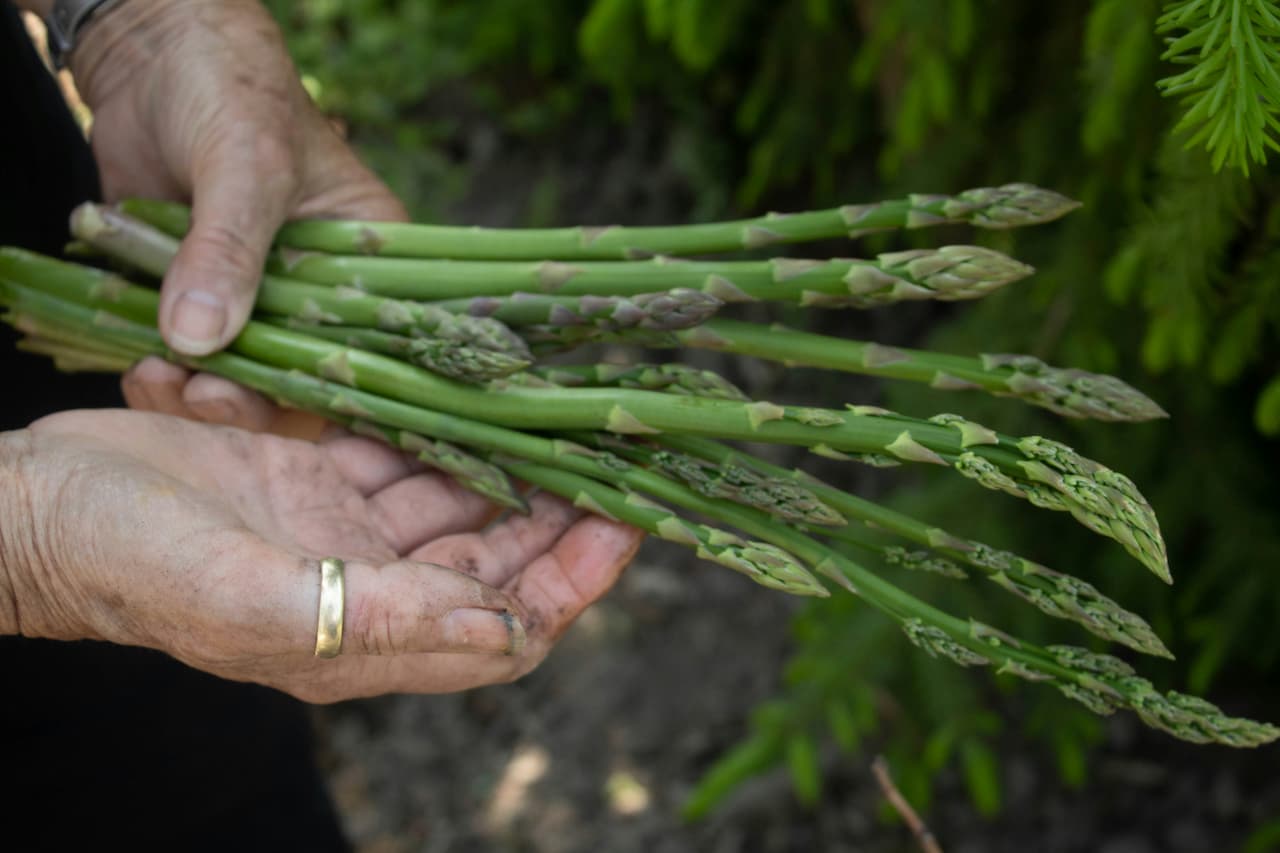
From the third or fourth year onwards, the asparagus season runs from mid-April through to mid-June – around eight weeks in most UK seasons, though this varies with weather and latitude. Harvest spears when they are 15-20cm tall, cutting or snapping them off just below the soil surface. The timing matters: spears that are allowed to grow too tall before cutting become woody and lose the tight bud tip that makes them worth eating. Once the tips begin to feather open, eating quality declines rapidly.
How often to harvest depends on the weather and the rate of growth. In cool springs, spears emerge slowly and may need cutting every two to three days. In a warm, settled spell in May, the same bed can produce spears that need cutting every day or the best ones will be past their peak before you get to them. Checking the bed daily during the main season is not excessive – it is how you catch spears at their best and it encourages the crown to send up more shoots. Each spear cut is a signal to the crown to produce another.
Cutting should stop completely by mid-June regardless of how many spears are still emerging. Stopping at the right time allows the ferns to develop and the crowns to rebuild their reserves. Cutting too late in the season is one of the most common causes of declining asparagus bed productivity over time – each additional week of late cutting is a direct borrowing from next year’s harvest. After mid-June, let all subsequent growth develop into ferns without interference.
Established asparagus benefits from a top-dressing of general-purpose fertiliser in spring as the spears begin to emerge, and again after the cutting season ends in mid-June. Well-rotted compost mulched around the crowns in autumn helps retain moisture, suppresses weeds and adds organic matter to the bed without the need for digging. Weeding must be done by hand or with a hoe kept very shallow – asparagus roots are close to the surface and deep cultivation damages them. The dense summer fern canopy suppresses annual weeds effectively once established, but in the first two or three years hand-weeding is necessary to keep the young crowns from being outcompeted. This is another reason why thorough perennial weed clearance before planting is so important – annual weeds can always be dealt with, but perennial roots woven between established crowns cannot.
Common problems
Slugs are the most damaging pest in the first two years, attacking emerging spears in wet springs. Slug controls – pellets, traps or nematodes – are worth deploying early in the season while spears are thin and vulnerable. Once the season is underway and spears are sturdy, slug damage is less significant. Asparagus beetle – a small, brightly marked black and orange beetle that defoliates asparagus ferns in summer – is a common problem on established beds. The adult overwinters in plant debris and in the soil near the asparagus bed, so clearing the old fern growth in autumn and disposing of it removes a significant proportion of the overwintering population.
A bed that produces well for several years and then declines is usually caused by one of three things: cutting too late so the crowns cannot rebuild, competition from perennial weeds that have established between the crowns, or waterlogging damage over successive winters. The first two are avoidable through good management from the start. Waterlogging is a structural problem requiring either improved drainage or a new bed elsewhere. Crown rot caused by Fusarium species is the most serious disease – infected crowns should be removed and destroyed, and asparagus should not be replanted in the same ground where crown rot has occurred.
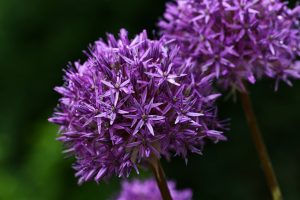
Purple berries appearing on plants in summer indicate female plants in the bed. Female asparagus plants are not worthless – they still produce spears – but they produce fewer and thinner ones than males, and the berries ripen and drop seed that germinates freely around the bed. These seedlings are tiny in their first year but become a genuine management problem within three to four seasons, overcrowding the established crowns and reducing overall productivity. If growing an all-male variety, any plant that produces berries is either mislabelled or has reverted: it should be removed. If growing a mixed variety like Connover’s Colossal, cutting off the berries before they ripen is the practical management approach.
An asparagus bed that has been well-established for many years may eventually become overcrowded as the crowns spread and multiply. Productivity that was high at year five and ten can begin to drop at year fifteen or twenty not because anything is wrong with the management, but simply because the crowns have filled the available space and are now competing with each other. At this point the realistic options are to thin the bed by removing some crowns carefully in autumn, or to start a new bed with fresh crowns in a different position and retire the old one gradually. Neither outcome is a failure – a bed that has produced for fifteen or twenty years has given excellent value from a single planting.
Share on socials: