At a glance
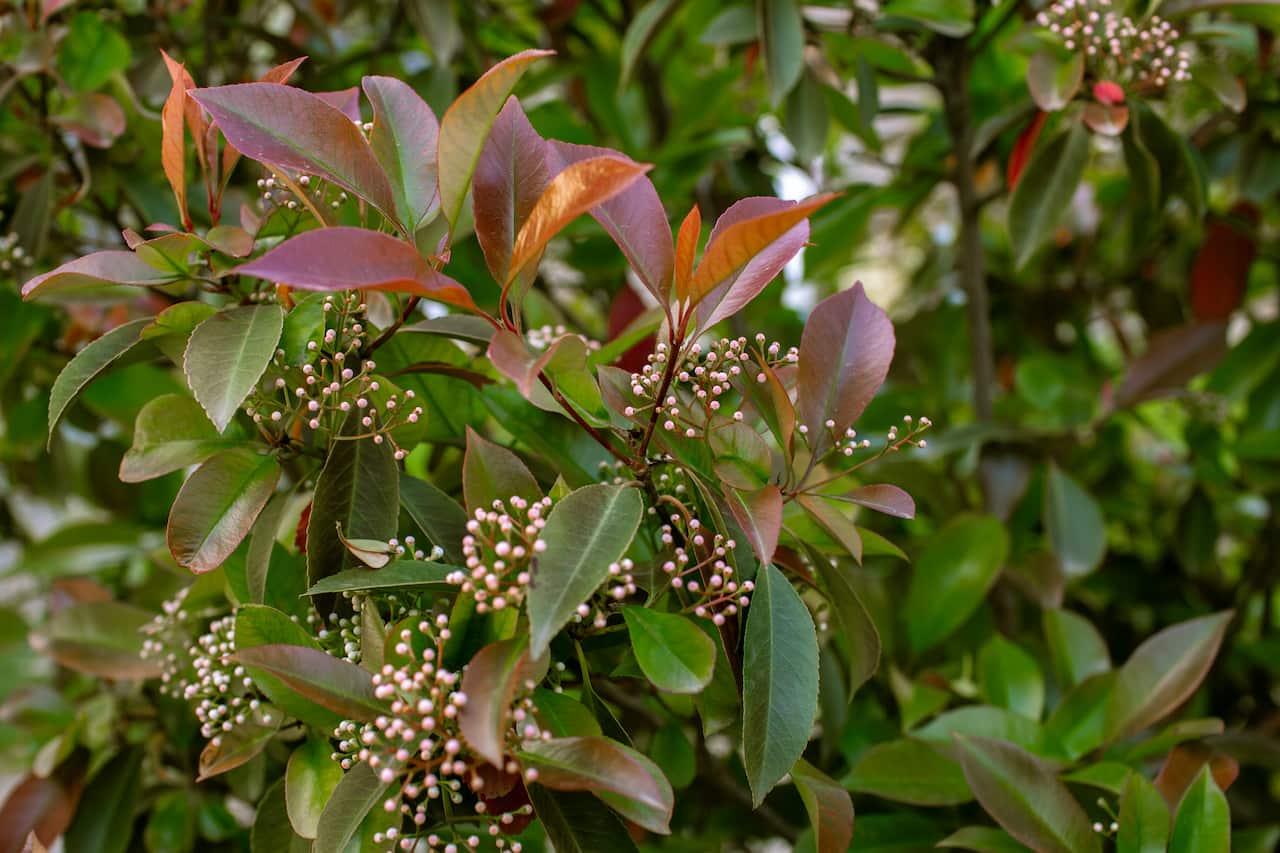
Most people who plant a photinia do it for one reason: those red leaves. The new growth on Photinia x fraseri ‘Red Robin’ is about as vivid as garden colour gets in spring, and it arrives reliably with every flush of new shoots and again after every trim. What catches people out is that the plant asks quite a lot in return. Get the conditions wrong and it sulks, develops leaf spot, or sits inert for years without producing the colour they bought it for. Get them right and it is one of the most rewarding and architectural evergreen shrubs in the UK garden.
The other thing worth knowing before you plant: photinia is more versatile than its reputation suggests. Most people think of it as a hedge plant, and it does make an excellent hedge, but left to grow as a specimen it develops into a proper small tree with structure and year-round presence. The red flush comes not just in spring but whenever new growth is triggered, which means the timing and frequency of pruning becomes part of how you manage the display. Understanding that relationship is the key to getting the best from it.
Varieties worth knowing
Photinia x fraseri ‘Red Robin’ is the one almost everyone plants, and for good reason. The spring flush is reliably intense, the plant is vigorous and resilient, and it is available in every size from pot-grown hedge whips to half-standard specimens. Left alone it will reach 4 to 5 metres over ten to fifteen years, though most gardeners keep it much smaller through regular trimming. ‘Carre Rouge’ is a French selection with particularly intense red new growth, darker and more sustained than ‘Red Robin’ in some evaluations and increasingly available in UK garden centres.
‘Pink Marble’ is a variegated form with cream and green foliage and a softer pink-red new growth flush. It is slower growing and less vigorous, which suits smaller gardens, but it is also more prone to reverting to plain green shoots that need cutting out whenever they appear. ‘Little Red Robin’ is the compact dwarf form reaching around 1 metre, and I have grown it in a large container on a patio where it held its colour well through the season with regular light trimming. For small gardens, raised beds, or pot growing, it is the form to choose.
Site and soil
The red colouration is directly tied to light levels. More sun means more vivid new growth, and the contrast between that flush of red and the dark mature leaves is what makes the plant worth having. In partial shade the plant will grow well enough, but the colour fades and the effect is diminished. In deep shade the red disappears almost entirely and the plant becomes an unremarkable evergreen. Full sun is the aim, south or west-facing wherever possible.
Shelter from cold, drying winds matters particularly in the north and in exposed positions. Prolonged cold winds desiccate the leaves and cause the winter browning that is often mistaken for disease. On strongly alkaline or chalk soils, photinia develops lime-induced chlorosis, the leaves go pale and yellowish, and no amount of feeding will fix it without addressing the underlying pH. A soil test on any ground that looks chalky is worth doing before you spend money on a plant that will struggle.
Planting
Container-grown plants can go in at any time of year, but autumn planting gives the best establishment. The soil is still warm enough for root growth, autumn rainfall does much of the watering work, and the plant enters its first spring with an established root system ready to push new growth. Spring planting works well too but requires more attention to watering through the first summer. Bare-root photinia is less commonly available than container-grown but can be planted during dormancy from November to March if it can be sourced.
Dig the hole wider than the rootball rather than deeper, and loosen the sides to encourage roots to spread into the surrounding soil. Place the plant at the same depth it was growing in the pot. Backfill with the original soil mixed with some garden compost, firm gently, water thoroughly, and mulch the surface to conserve moisture and suppress weeds. Keep the mulch clear of the main stem.
Photinia can be planted against a wall or fence, and a south or west-facing wall produces the best colour and fastest growth. The main risk with wall planting is the rain shadow at the base, where the soil stays dry even through wet periods. Water regularly until established and keep the mulch topped up. Spacing for hedging: 60 to 90 centimetres apart for a formal hedge, wider for a more informal screen. For specimen planting, allow at least 2 metres clearance in all directions.
Feeding and watering
For the first two years, consistent watering in dry spells is the single most useful thing you can do. Established photinias are reasonably drought-tolerant, but young plants establishing in their first and second summers need moisture to develop a root system large enough to sustain the vigorous top growth the plant naturally wants to make. A long, deep water once or twice a week in dry periods beats frequent light watering every time.
Feed in spring with a balanced slow-release fertiliser or blood, fish and bone worked into the soil surface. Repeat in early summer if the plant is in poor soil or growing as a hedge where competition is high. Avoid feeding after midsummer, since late growth pushed by fertiliser is more susceptible to frost damage and to leaf spot infection. Container-grown photinias need more regular watering and feeding than those in the ground. A liquid feed every two to three weeks through the growing season keeps them performing, and containers should be moved to a sheltered spot in winter to protect the roots.
Pruning for maximum red colour
This is the part that makes the biggest difference, and it is the part most people get instinctively wrong. The red colour is in the new growth only. Mature leaves turn dark, glossy green within a few weeks of emerging, so the strategy for maximum colour is to trigger new growth as often and as reliably as possible during the growing season.
For specimen plants, prune in late spring once the first flush of new growth has turned green, and again in midsummer. Each pruning triggers another flush of red. A light trim with shears rather than a hard cut is usually enough. Never cut back into old wood that has no leaves. Photinia does not reliably regenerate from leafless old wood the way some shrubs do. For hedging, trim after the spring flush has matured, typically May to June, and again in late summer. Two trims a year maintains a neat hedge and produces two colour displays.
Avoid pruning after August in the north. Late-season cuts push new growth that does not have time to harden before the first frosts. In exposed northern gardens or on elevated sites, late August is the cutoff. Further south you can push to early September, but the risk of frost-damaged new growth rises the later you cut.
Photinia leaf spot
Leaf spot, caused by the fungus Diplocarpon mespili (commonly referred to by its older name Entomosporium mespili), is the main thing that goes wrong with photinia in the UK, and in a wet season it can be genuinely disfiguring. The symptoms are circular red-brown spots on the leaves, often with a yellow halo, that gradually merge and cause the leaf to drop prematurely. A severe attack can defoliate a plant significantly within a single season. The disease spreads by spores released in wet conditions and is worst in warm, humid weather with poor air circulation.
Prevention is more effective than treatment, and good air circulation is the most important factor. Avoid planting photinia too close to walls or other plants, and keep hedges trimmed rather than letting them grow dense. Water at the base rather than overhead. Remove and bin fallen infected leaves rather than composting them. The fungus overwinters on fallen leaves and infected plant tissue, so thorough autumn clearance reduces the reservoir of spores available to infect next spring’s new growth.
Where the disease is established, a copper-based fungicide spray applied at the first sign of infection and repeated every two weeks through the susceptible period can slow the spread. Complete elimination is rarely achieved once the disease is in the garden, but good cultural conditions keep it at a manageable level. If a photinia in a wet, shaded or crowded spot develops persistent leaf spot every year, the honest answer is that the site is wrong. Moving it to better conditions is more effective than repeated fungicide applications.
One counter-intuitive point: if leaf spot is bad on a plant, it is worth suspending the trimming schedule temporarily. Trimming triggers new growth, and new growth is the tissue the fungus preferentially infects. Reduce the number of trims in a bad leaf spot year and let the flush of new growth mature before the next cut.
Growing as a hedge
Photinia makes an excellent evergreen hedge with year-round colour and structure. Growth is fast enough to establish a useful hedge in three to five years but not so fast that it requires constant attention. Starting from 60 to 90 centimetre plants, expect 1.5 metres within three years and 2 metres within four to five years in reasonable conditions. On poor soil or in a dry site, add a year to these figures.
For a formal hedge, start with plants at the smaller end of the available size range. They establish faster than large transplants and within two years will have caught up with a plant that was twice the size at planting. Trim to shape from the first season to encourage dense branching from the base. A hedge that is allowed to grow unchecked for the first year or two becomes bare at the base, which is very difficult to correct later.
The ideal profile is slightly tapered, wider at the base than the top. This allows light to reach the lower foliage and prevents the base from dying back. Note that photinia, while a good hedge plant, is not a particularly dense one. If complete privacy is the goal, it may not be the right choice. Laurel or hornbeam provides denser screening. Where you want colour, structure and year-round interest rather than an impenetrable barrier, photinia earns its place.
Growing in containers
‘Little Red Robin’ is the obvious choice for containers, and it genuinely suits pot life in a way the full-sized forms do not. Start it in a 25 to 30 litre container and move to 35 to 40 litres after two to three years as the root system develops. Do not overpot by moving to a container much larger than the root system needs, as the excess compost stays wet and risks root rot. Full-sized ‘Red Robin’ will grow in a large container but needs at least 50 to 60 litres to sustain it, and will eventually become difficult to manage as the plant matures.
Use a soil-based compost rather than a lightweight multipurpose mix, which breaks down too quickly and loses structure in large containers. Add grit to improve drainage. A pot with good drainage holes is essential. Container plants need repotting every two to three years into a slightly larger container as the root system develops. Move containers to a sheltered spot away from hard frost in winter, or wrap the pot in bubble wrap or hessian to insulate the roots.
Common problems
Most problems with photinia come down to either the site being wrong, a disease that good cultural conditions would have prevented, or pruning that has damaged the plant’s structure. The table below covers the most frequent issues and what to do about them.
Share on socials: