At a glance
A cold frame is one of the most cost-effective structures a UK gardener can build. For £20 to £60 in materials and a few hours of straightforward joinery, you gain a structure that extends the growing season by four to six weeks at both ends of the year, protects tender plants from frost and wind damage, and allows early crops to get started weeks before they could survive unprotected outside. It is not a greenhouse – there is no heating, no electricity and no complexity. It is simply a box with a transparent lid that traps warmth, blocks wind and sheds rain.
The design has barely changed in two hundred years because it does not need to. A sloped timber frame with a glazed lid tilted toward the south – lower at the front, higher at the back – is all a cold frame needs to be. The slope sheds rainwater and angles the lid toward the winter sun to maximise light capture. Everything else is optional. This guide covers a straightforward DIY build using treated timber and polycarbonate sheet, which can be adapted to any size and completed by any confident beginner in a morning.
What a cold frame is and what it does
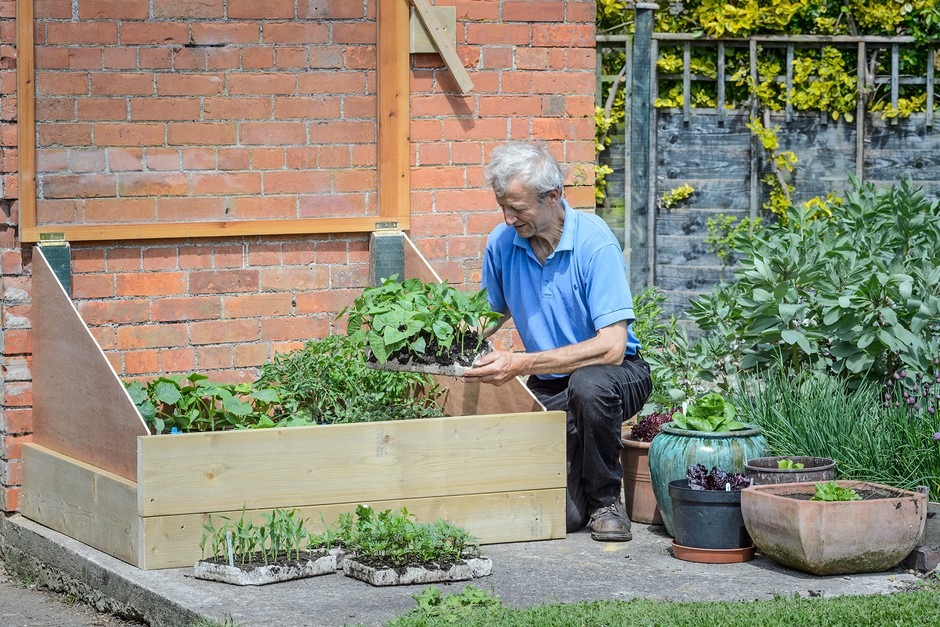
The practical uses of a cold frame stretch across the whole gardening year. The most valuable application is hardening off seedlings – the essential process of acclimatising plants raised indoors or in a heated greenhouse to outdoor conditions gradually before planting out. Without hardening off, moving a seedling directly from a warm windowsill to a cold April border causes leaf scorch, growth check and often losses. A cold frame bridges that gap, providing outdoor temperatures and humidity with wind protection and controllable ventilation.
What you’ll need
Step by step build guide
The standard size for a DIY cold frame is 120cm wide by 60cm deep – large enough for a meaningful number of seed trays and pots, small enough to cut from standard sheet materials without waste. The back board sits at around 35cm high and the front board at 20cm, giving a slope of 15cm over the 60cm depth. This slope sheds rainwater reliably and angles the glazed lid toward the south at roughly 14 degrees – enough to make a meaningful difference to light capture on low winter sun days.
Cut the four frame boards
Cut one back board at 120cm x 35cm height, one front board at 120cm x 20cm height, and two side boards as trapezoids – 60cm long at the base with the top edge cut at an angle to match the 15cm slope from back to front. Mark the angle using a straight edge between the back and front board heights, then cut along that line. Pre-drill all screw holes to prevent splitting.
Treat all cut ends
Before assembly, brush exterior wood preservative onto every cut surface, paying particular attention to the bottom edges that will sit on or near soil. Cut ends absorb moisture readily and are the first point of rot in any outdoor timber structure. Allow to dry for 30 minutes before assembly.
Assemble the box
Drive screws through the front and back boards into the ends of the side boards. Use two screws per joint for a 75x25mm board. Check for square by measuring diagonals – both should be equal. If the frame racks slightly, apply gentle pressure on the longer diagonal while driving the final screws. No glue is needed for a structure this size.
Build the lid frame
Build a simple rectangular timber frame to hold the glazing – 4 pieces of 50x25mm timber screwed at the corners to form a frame that sits on top of the box. This lid frame should match the outer dimensions of the box exactly so it rests on the top edges. If using a recycled window, skip this step and use the window frame directly.
Fit the glazing and hinges
Cut polycarbonate sheet to fit the lid frame using a fine-toothed saw or sharp knife and straight edge. Fix it to the lid frame using roofing screws with integral washers – these spread the load and allow the sheet to expand and contract thermally without cracking. Fit two hinges at the back of the lid to attach it to the back board of the box. The lid should open and rest at 90 degrees easily with no catches needed for normal ventilation.
Position and add a prop stick
Place the finished cold frame on its chosen site with the lid sloping toward the south. Cut a simple prop stick – a length of timber or bamboo 20-30cm long – to hold the lid open at different heights. A notched stick allows you to choose between a small ventilation gap and a fully open position without holding the lid manually each time.
Size the cold frame to match your glazing, not the other way around. If you have a recycled window available, measure it first and build the box to those dimensions. A free salvaged window can save £20-£30 on glazing costs and produces a better-insulated lid than polycarbonate. The box takes less than an hour to build – the glazing is the expensive part.
Glazing options compared
The choice of glazing material affects the weight, safety, insulation value and cost of the finished frame. Two materials dominate for DIY builds in the UK – salvaged glass and twin-wall polycarbonate – and they represent meaningfully different trade-offs. A third option, single-layer polycarbonate, is cheaper but provides significantly less insulation and is only worth considering for a structure used primarily in spring and autumn rather than through winter.
How to use your cold frame
Ventilation is the single most important management task with a cold frame, and the one most often neglected. On sunny days from late February onward – even cold ones – temperatures inside a closed cold frame can climb rapidly to levels that scorch or kill seedlings. A cold frame on a clear February morning can reach 25-30C inside within an hour of sunrise. Open the lid partially or fully whenever the outside temperature is above 5C and the sun is out. The prop stick makes this a thirty-second job rather than a complicated decision.
For hardening off, the standard method is to move plants from indoor conditions into the cold frame for ten to fourteen days before planting out. Start with the lid closed for the first two to three days, then prop it open progressively during the day for the following week, then leave it open overnight in the final few days before planting. This gradual process prevents the leaf scorch and growth check that result from moving edible crops directly from a warm indoor environment to full outdoor exposure. The cold frame is equally useful for lavender and other tender perennial cuttings, giving them protection through their first winter before planting out the following spring. For growing early radishes, salad leaves and spring onions, a cold frame can have crops ready to harvest a full month earlier than unprotected outdoor sowings, which for keen growers makes the few hours of building time a very efficient investment. A well-positioned cold frame also serves as useful overflow during the main growing season – a place to hold young plants waiting for space to open up in the raised bed.
Never leave a cold frame closed on a sunny day, even in winter. Direct sun on a closed cold frame can raise internal temperatures above 30C within an hour regardless of the outdoor temperature. This kills seedlings, forces tender plants out of dormancy prematurely, and scorches leaves irreparably. Check the frame every clear morning and prop the lid open before leaving for the day.
Share on socials: