At a glance
Garden decking is one of the most transformative outdoor DIY projects a UK homeowner can take on. A well-built deck extends usable living space, creates a defined outdoor room and adds genuine value to a property. It is also more achievable than most large outdoor projects – the skills required are basic carpentry rather than anything specialist, and the materials are straightforward to work with for anyone comfortable using a circular saw and drill.
The reputation that UK timber decking has for becoming soft, slimy and warped within a few years is entirely deserved for decks built badly – from cheap boards, on poorly ventilated frames, left untreated. A deck built correctly from good pressure-treated timber on a solid frame, treated annually, will look excellent for 15-20 years. The difference is almost entirely in the preparation and frame work that sits below the boards and is never seen again once the deck is finished. Getting that foundation right is what this guide focuses on first.
Planning and regulations
A ground-level deck under 300mm above ground in a rear garden generally does not require planning permission in England under permitted development rights, provided it covers less than 50% of the total garden area. Decks over 300mm high, decks in Conservation Areas or on listed buildings, and any deck that would reduce the garden’s permeable area significantly may require a planning application. Always check with your local planning authority before starting work on anything elevated or near a boundary.
A deck over 300mm high may require Building Regulations approval. If the deck is attached to the house or forms part of a route to an emergency exit, Building Regulations compliance is likely required regardless of height. For a simple ground-level free-standing deck in a rear garden this is rarely an issue – but confirm before starting work on anything elevated. The planning rules that apply to decking are the same framework that governs garden rooms and offices under permitted development.
What you’ll need
Choosing decking materials
The choice of decking material is the single biggest determinant of how long the finished deck lasts and how much ongoing maintenance it requires. Pressure-treated softwood dominates the UK market for good reason – it is widely available, well-priced, easy to work and lasts 15-25 years when treated annually. Composite decking costs more upfront but eliminates annual treatment and is increasingly the preferred choice for anyone who values low maintenance over initial cost.
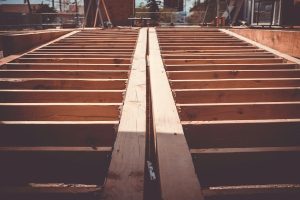
Building the frame
The subframe is the most important part of the deck and the part that receives the least attention. A poorly built frame – inadequately ventilated, with timber in ground contact, with joists too widely spaced – is the reason decks warp, flex, rot and become slippery. Spend more time on the frame than on anything else. It is entirely hidden once the boards go down, but it determines everything about how the finished deck performs over the next two decades.
Clear the site and lay weed membrane
Remove all vegetation from the deck area. Lay weed control membrane across the entire ground surface beneath the proposed deck. This prevents plant growth pushing up through gaps between boards and maintains better airflow beneath the frame by keeping the ground drier. Avoid solid sheeting that traps moisture.
Set out the perimeter frame and check for square
Lay out the outer perimeter frame using 100x47mm pressure-treated joists. Check for square by measuring both diagonals – they must be equal. A deck that is not square creates problems at every stage that follows and looks wrong. Use the 3-4-5 triangle method or simply measure diagonals repeatedly as you adjust. Support the frame on adjustable deck feet or concrete pads – never set timber directly into soil.
Set the fall away from the house
The frame must slope very slightly away from any adjacent building – a fall of 1:100 (10mm per metre) prevents water pooling on the deck surface and directing rainwater toward the house foundations. Use a long level and a 10mm packing piece at the far end to set and check this fall before fixing joists permanently.
Add internal joists at 400mm centres
Fit internal joists across the frame at 400mm centres for 32mm boards, or 600mm centres for thicker boards. All cut joist ends must be treated with end-grain preservative before assembly – this step is skipped on almost every failed deck and is the single most common cause of early rot. Use joist hangers or angle brackets to connect internal joists to the perimeter frame for a rigid, rattlefree structure.
Check ventilation clearance
Before laying boards, check that there is at least 150mm of free air space between the underside of the joists and the ground. Poor airflow beneath a deck is the primary cause of rot in the frame timber. If the clearance is too low, raise the deck on taller feet or dig out ground beneath the frame.
Never set timber posts or joists directly into soil. Ground contact is the fastest route to rot regardless of how well the timber is treated. All structural timber must sit on concrete pads, adjustable feet or galvanised post bases that hold it clear of the ground and allow moisture to drain freely. This single rule separates decks that last twenty years from those that need replacing in five.
Laying the deck boards
Board laying is the most visible stage but the least technically demanding if the frame has been built correctly. The main decisions are direction of run, gap between boards and the fixing method. Boards running at 90 degrees to the joists are standard. Diagonal runs at 45 degrees look more interesting but require approximately 15% more material due to waste at the edges. Herringbone patterns are striking but significantly more labour-intensive and are rarely worth the additional effort for a first deck.
Fix boards with two screws per joist crossing – one screw allows boards to pivot and twist as they weather. Drive screws just below the surface so no screw head protrudes as a trip hazard. Apply a decking oil, stain or preservative treatment to all new softwood immediately after the boards are laid and before the deck is used. New pressure-treated timber still benefits from a surface sealant that begins UV protection and slows the greying that occurs within the first season of exposure. Thereafter treat annually in spring – clean the deck thoroughly first, allow it to dry completely, then apply treatment. The approach to choosing and treating timber for outdoor projects follows the same principles across all exterior woodwork.
Typical costs and finishing
Decking costs vary significantly with size, timber choice and whether you are doing the work yourself or using a contractor. The figures below are realistic ballpark estimates for pressure-treated softwood in England at 2026 prices. Composite adds roughly 50-80% to board costs but eliminates ongoing annual treatment. A well-built deck also creates an ideal outdoor lighting opportunity – solar deck lights fitted to the frame edge or posts transform how the deck looks and functions in the evenings at minimal cost.
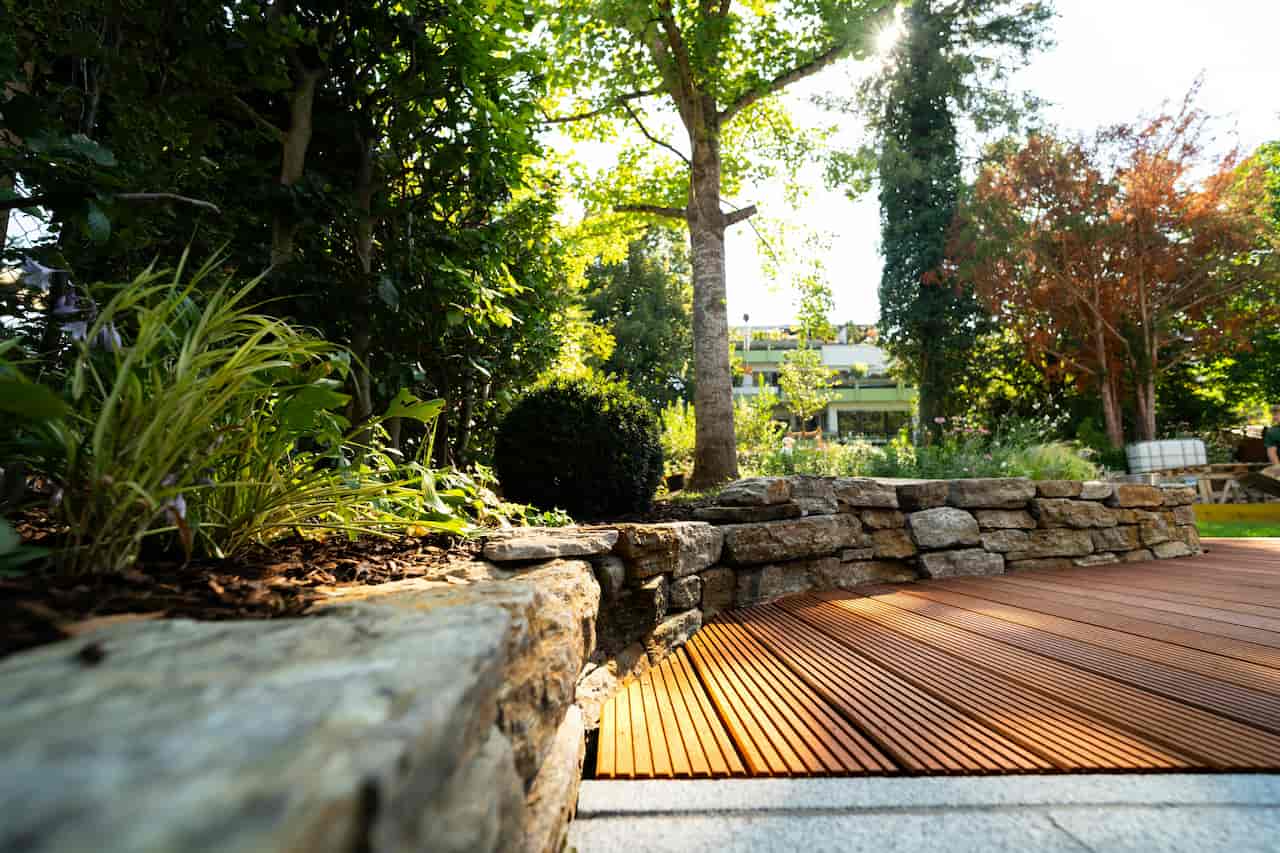
Fit fascia boards to the outer edges of the frame to conceal the structural joists and give a neat, finished appearance. Sand any rough board edges and splinters, particularly in areas where children or bare feet will be present. A deck built with care at every stage – from a square, ventilated frame through to correctly fixed boards and annual treatment – is one of the best long-term investments a garden can accommodate. It integrates naturally with paving at ground level or connects to garden steps where a level change exists between the deck and the garden below.
Share on socials: