At a glance
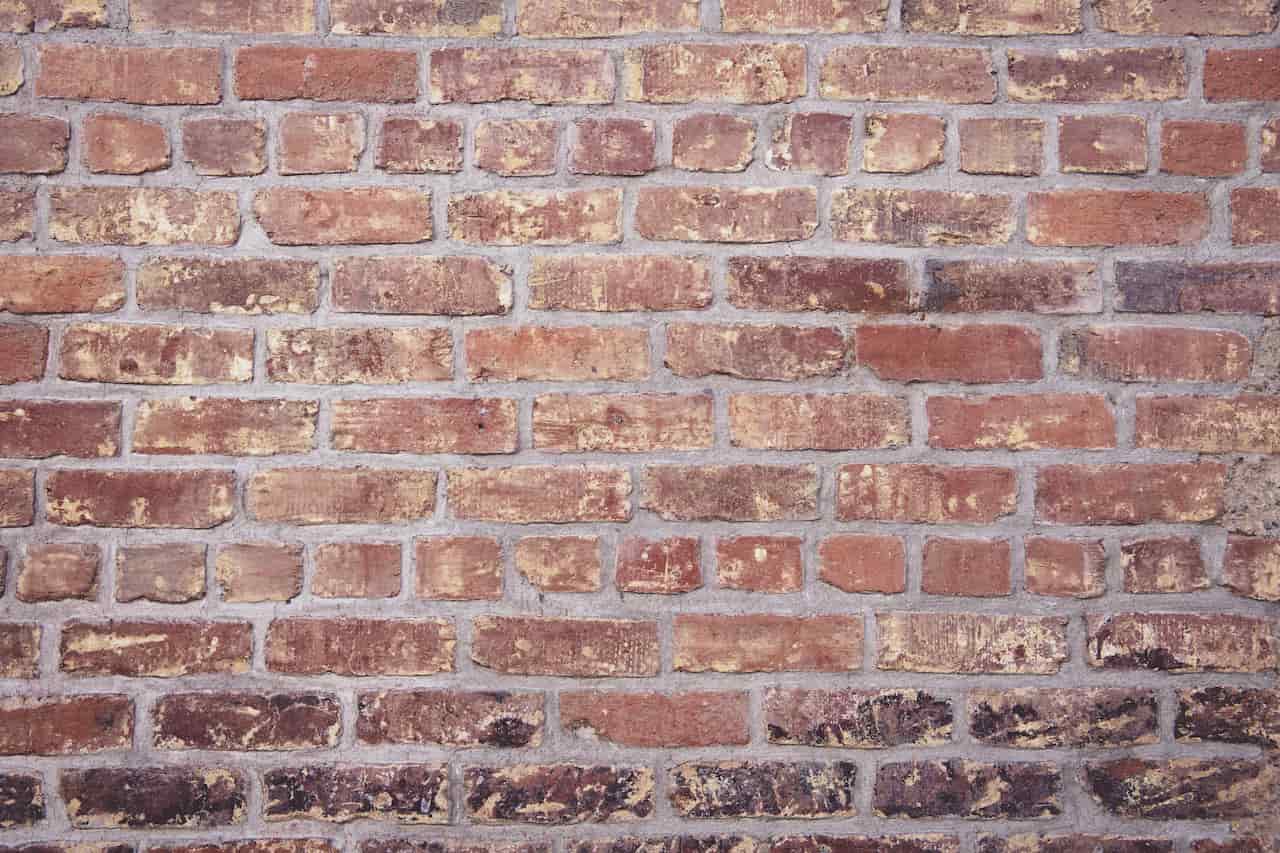
Repointing is the process of removing deteriorated mortar from the joints between bricks and replacing it with fresh mortar. It is one of the most important maintenance jobs on any UK brick-built property – good pointing keeps water out of the wall structure, and failed pointing lets it in. Damp penetration through deteriorated mortar joints is one of the most common causes of internal damp in UK homes, and repointing is almost always far cheaper than dealing with the damage that follows if it is ignored.
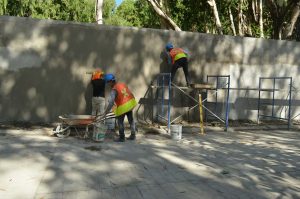
For most homeowners, repointing a section of wall or a chimney stack is a realistic DIY job that requires patience and the right materials rather than specialist skills. The critical rule – one that causes more failed DIY repointing jobs than any other – is matching the mortar strength to the age and type of the brickwork. Getting this wrong can cause more damage than doing nothing at all.
When does brickwork need repointing?
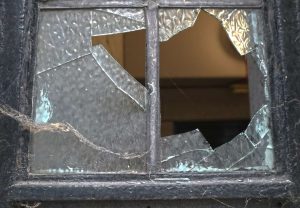
Most brickwork needs repointing at some point – mortar is a softer material than brick and weathers over time. In the UK climate, with its cycles of wet winters and freeze-thaw conditions, mortar typically lasts 50-80 years on sheltered walls and considerably less on exposed ones. Signs that repointing is needed include mortar that is recessed more than about 5mm below the brick face, mortar that crumbles easily when probed with a screwdriver, cracks running along the joints, and any evidence of water penetration on the internal face of the wall.
Choosing the right mortar mix
This is the most important decision in any repointing job – and the one most often got wrong. Modern cement-heavy mortars are significantly stronger and less permeable than the lime-based mortars used in older buildings. If you use a strong modern mortar on old soft brickwork, the mortar becomes harder than the bricks themselves. When the wall moves or moisture tries to escape, it damages the bricks rather than the mortar joints – and damaged bricks are expensive to fix.
Never use a modern cement-heavy mortar on pre-1920s brickwork. Victorian and Edwardian properties were built with soft bricks and lime mortar designed to allow the wall to breathe and flex. Repointing with a strong cement mix traps moisture, causes spalling (face of bricks breaking away) and can cause serious structural damage over time. Use a lime-based mortar instead.
If you are unsure which mix is right for your property, take a small sample of the existing mortar to a builders merchant. Most will be able to advise on the correct mix and help you match the colour. Pre-mixed repointing mortars are available for both lime and cement applications and take the guesswork out of proportions.
Tools you will need
Repointing does not require many specialist tools but having the right ones makes the job significantly faster and produces a better result. The most important is the tool used to rake out the old mortar – the correct approach is mechanical raking rather than hammering, which risks cracking the bricks.
- Angle grinder with raking disc – the fastest way to remove old mortar from horizontal joints. Use with care on older soft brickwork – a light touch is essential.
- Plugging chisel and club hammer – for vertical joints and for working near brick faces where a grinder is too risky. Chisel along the joint rather than across it.
- Pointing trowel – a small, narrow trowel for pressing mortar into the joints. A standard bricklaying trowel is too large for most repointing work.
- Hawk – a flat board with a handle used to hold mortar while working. Keeps the mortar accessible without repeatedly returning to the mix.
- Stiff brush – for cleaning out raked joints and brushing down the finished work before the mortar fully sets.
- Bucket and mixing paddle – for preparing mortar to a consistent workable consistency.
How to repoint brickwork – step by step
Work on a dry day with no rain forecast for at least 24 hours. Avoid repointing in direct hot sun which dries mortar too fast, or in temperatures below 5 degrees Celsius. A cloudy dry day in spring or early autumn is ideal for repointing in the UK.
- Step 1 – Rake out old mortar. Remove mortar to a depth of at least 15-20mm. Any shallower and the new mortar will not have enough depth to bond securely. Use the angle grinder for long horizontal runs and the plugging chisel for vertical joints and areas close to the brick face. Wear eye protection – raking throws debris.
- Step 2 – Clean the joints. Brush out all loose material with a stiff brush, then dampen the joints with clean water. This prevents the dry bricks and old mortar from drawing moisture out of the new mix too quickly, which weakens the bond and causes premature cracking.
- Step 3 – Mix the mortar. Mix to a firm but workable consistency – it should hold its shape when squeezed but not be so stiff it crumbles. Mix only as much as you can use in around 30-40 minutes before it starts to set.
- Step 4 – Apply the mortar. Load the hawk with mortar and use the pointing trowel to press it firmly into the joints. Fill vertical joints first, then horizontal ones. Press the mortar in firmly to eliminate air pockets, slightly overfilling each joint.
- Step 5 – Profile the joints. Once the mortar has stiffened slightly but before it fully sets – usually 30-60 minutes depending on conditions – run a finishing tool or the edge of the trowel along the joints to create the desired profile. The finish should match the existing pointing on the wall.
- Step 6 – Clean off. Once the mortar has set enough not to smear (usually a few hours), brush the face of the brickwork with a stiff dry brush to remove any mortar residue. Do not use water at this stage as it can stain the bricks.
Work in small sections of around 1 square metre at a time. This keeps the mortar manageable and ensures you can finish and profile each section before it sets too hard. Trying to cover too large an area in one go is the most common reason DIY repointing produces an uneven or patchy finish.
Finishing styles
The profile of the finished joint matters both aesthetically and functionally. The finish should match the existing pointing on the wall – mixing finishing styles on the same wall looks poor and can affect weathering performance. Flush pointing sits level with the brick face and is common on modern buildings. Weatherstruck pointing slopes slightly outward from top to bottom, shedding water away from the joint and providing good weather resistance – it is the most common style on UK properties built from the 1930s onwards. Recessed pointing sits slightly back from the brick face and suits certain architectural styles but is less weathertight on exposed walls.
Common mistakes to avoid
Using too strong a mortar mix on older brickwork is the most serious mistake and can cause lasting damage – the section on mortar mixes above covers this in detail. Raking out too shallowly is the second most common problem – joints raked to only 5-10mm depth will not hold the new mortar securely and it will work loose within a few years. Not dampening the joints before applying mortar leads to weak bonding and early cracking. Applying mortar in direct sun or frost causes it to dry too fast or freeze before curing, both of which result in failed pointing that needs to be removed and redone.
On listed buildings or properties in conservation areas, check with your local planning authority before repointing. Some areas have restrictions on materials and methods, particularly where lime mortar is specified as a condition of planning consent. If the damp walls inside your property are related to failed pointing, repointing the affected area and allowing the wall to fully dry before treating internal surfaces is the correct order of works – treating the symptom before fixing the cause rarely produces lasting results.
Share on socials: