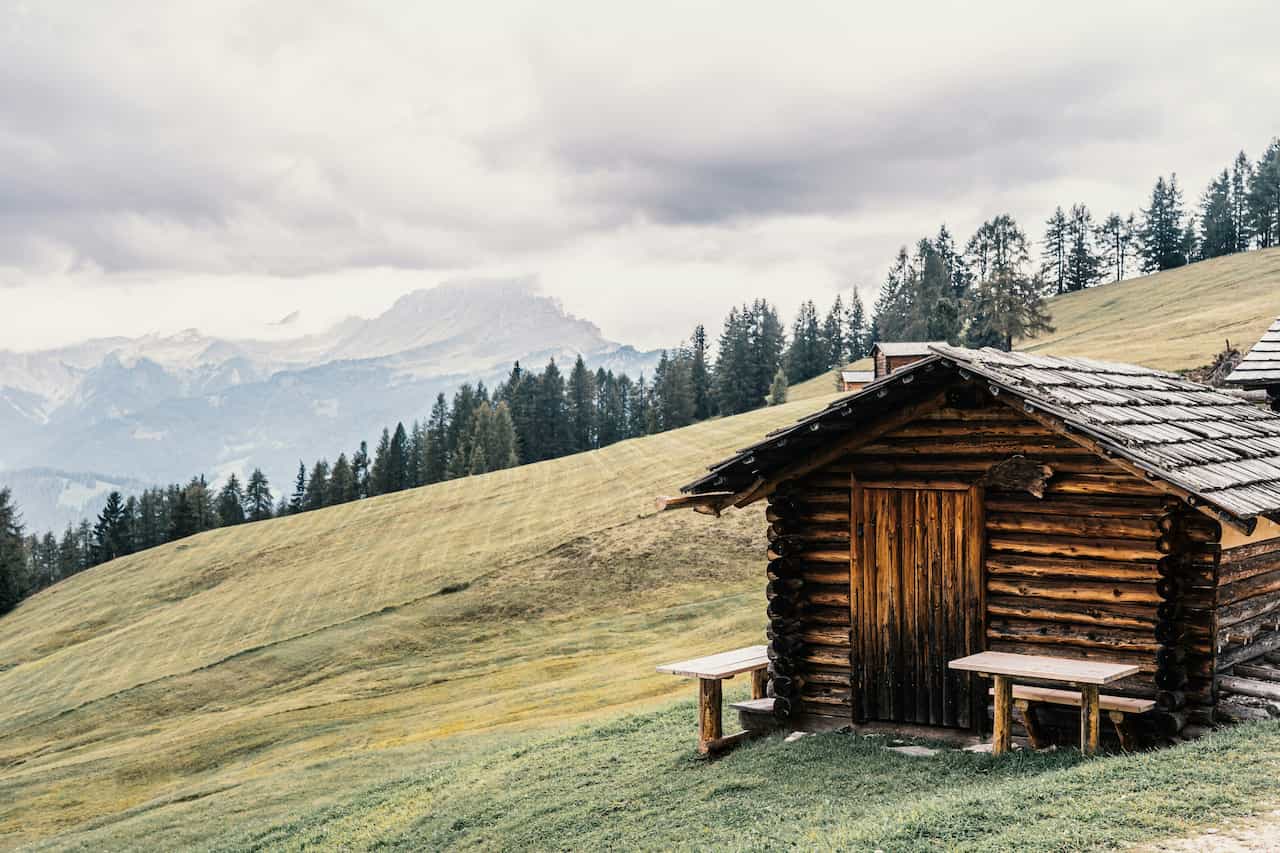
At a glance
A garden log cabin that is genuinely comfortable in January and July rather than just on mild autumn afternoons requires proper insulation – not the thin layer of mineral wool sometimes stapled to the roof boards and described as insulated by the cabin manufacturer. A fully insulated log cabin with appropriate heating and ventilation becomes a usable home office, studio or garden room for twelve months of the year. The difference between a properly insulated cabin and an uninsulated one is dramatic from the first cold night of autumn, and the difference in running cost when heating a properly insulated space versus a poorly insulated one is equally significant.
The insulation approach for a log cabin differs from insulating a brick-built house in one fundamental respect: timber moves. Log cabin walls expand and contract with changes in moisture content and temperature throughout the year, and any insulation system that does not accommodate this movement will develop gaps, cold bridges and cracking finish surfaces over time. The materials and methods that work best are those specifically compatible with a moving timber structure – which rules out some approaches commonly used in masonry buildings and makes both the material selection and the detailing more specific than it might initially appear.
Why log cabins need insulating differently
The walls of a standard garden log cabin are typically 28mm to 70mm of interlocking timber logs. Even at 70mm, this provides only modest thermal resistance – a solid timber wall at 70mm achieves a U-value of approximately 0.8 W/m2K, compared to the 0.18 W/m2K or better now expected for a habitable garden room. The roof is usually a single layer of tongue-and-groove boards covered with roofing felt: effectively no thermal resistance at all. The floor is typically a single layer of boards over joists with bare ground or air beneath. All three areas need addressing to bring the cabin to a standard where it holds heat usefully and can be heated economically.
Understanding U-values is useful for deciding how much insulation to add. A U-value measures how much heat passes through one square metre of a construction per degree of temperature difference between inside and outside – a lower number is better. An uninsulated log cabin wall might have a U-value of 0.8; adding 100mm of mineral wool plus a finish layer brings this to approximately 0.25. The roof of an uninsulated cabin might be 2.0 or worse; adding 100mm of PIR brings it to under 0.2. These differences translate directly to comfort and heating costs – a cabin with a roof U-value of 2.0 loses heat through the ceiling faster than any practical heating system can compensate on a cold night.
Condensation is the other critical consideration that distinguishes timber buildings from masonry. When warm, moisture-laden air from a heated cabin meets a cold surface – the inside face of an uninsulated wall or roof board – it deposits moisture. In a masonry building this is managed through ventilation and vapour control layers. In a timber building it is more critical because timber is directly vulnerable to rot if it remains damp for extended periods. Any insulation system for a log cabin must include a vapour control layer on the warm side of the insulation to prevent moist air reaching the cold timber surfaces where condensation would form. This is not optional and cannot be retrofitted easily – it must be included as an integral part of the insulation build-up from the start.
A word on planning permission before starting any work. Most log cabin insulation projects – fitting internal insulation to the existing structure – do not require planning permission and are covered by permitted development rights. However, if the work involves changing the external appearance of the cabin, raising the roof height, or the cabin is in a conservation area, permitted development may not apply. It is always worth confirming with the local planning authority before starting any structural work. Building regulations may apply if the cabin is being converted to a habitable space for sleeping – internal insulation alone for an office or studio typically falls below the threshold, but it is worth checking if the intended use changes.
Insulation materials compared
Rigid PIR (polyisocyanurate) foam board is the most thermally effective insulation per millimetre of thickness and is the material of choice where depth is limited – particularly in roof spaces with low headroom, or floors where raising the finished level is undesirable. A 50mm PIR board provides approximately the same thermal resistance as 100mm of mineral wool, making it worth the higher unit cost in constrained applications. PIR boards typically have foil facings on both sides, which act as vapour retarders and reduce the amount of air that can pass through joints – though a dedicated vapour control layer is still recommended for roofs, where the consequences of getting the moisture balance wrong are most severe.
Sheep’s wool is the only insulation material that handles moisture in a genuinely beneficial way. It can absorb a significant proportion of its own weight in moisture and release it slowly without losing its thermal properties or promoting mould growth. In a log cabin where the walls have some inherent moisture buffering capacity anyway, sheep’s wool between battens is a sympathetic and practical choice. It is more expensive than mineral wool but the moisture management behaviour is a genuine advantage in a timber building rather than just a marketing claim.
The one material to avoid entirely in a log cabin is spray polyurethane foam. Applied to the inside face of walls or the underside of roof boards, spray foam bonds rigidly to the timber and prevents the natural expansion and contraction the structure relies on. It also creates a vapour barrier at the wrong point in the construction, trapping moisture within the timber rather than managing it at the warm surface. Spray foam applied to a log cabin wall also makes any future replacement or repair work extremely difficult, as it bonds the logs together and makes individual log removal almost impossible. Whatever its merits in other applications, spray foam is not appropriate for timber frame or log cabin construction.
The vapour barrier – what it is and how to fit it
The vapour control layer is the single most misunderstood element of log cabin insulation, and the one most commonly omitted or installed incorrectly. Its purpose is to prevent warm, moist interior air from reaching the cold outer surfaces of the structure where it would condense into liquid water. Without it, moisture migrates through the insulation and deposits on the cold timber – invisibly, inside the wall or roof build-up, where it cannot dry out and begins to cause rot and mould growth that may not become visible for several years.
The vapour barrier does not need to be an elaborate installation – it is simply a continuous sheet of the correct membrane fixed over the insulation layer, with all joints lapped and taped. The critical principle is continuity: a vapour barrier with even a small number of unsealed penetrations provides significantly less protection than a continuous one. Every fixing, every cable entry, every pipe penetration needs to be sealed with tape around it before the finish layer goes on. This is tedious work but it is the foundation on which the rest of the insulation system performs correctly.
How to insulate each area
The three areas to address in order of priority are the roof, the floor and the walls. The roof is always the starting point because heat rises and roof heat loss in an uninsulated cabin dominates the thermal performance of the whole building. The floor comes second because cold floors make a space feel cold regardless of air temperature – a warm ceiling with a cold floor is still an uncomfortable space. The walls, while important, provide some inherent resistance from the timber itself and can be staged last if budget or time requires the work to be phased.
Roof. Fix 50mm timber battens to the inside face of the roof boards running across the width of the cabin, spaced to accept insulation boards snugly. Cut PIR boards to fit tightly between the battens with no visible gaps – gaps are cold bridges that undermine the performance of the whole system. Apply foil tape over every joint in the PIR boards. Fix a vapour control membrane over the entire insulated surface, lapping sheets by at least 100mm and taping all laps and edges with proprietary vapour barrier tape. Finally, fix a finish layer – tongue-and-groove cladding or 12.5mm plasterboard – over the battens to complete the ceiling. On a pitched roof where the original roof boards can be accessed from outside (where the felt is being replaced), fitting rigid insulation above the roof boards before relaying the felt is also an option that keeps the ceiling height unaffected – though this requires the roof covering work to be coordinated with the insulation.
Floor. Where there is accessible space beneath the floor, fit EPS or PIR boards between the floor joists from below, supporting them with netting, battens or proprietary insulation clips to prevent them dropping over time. Tape all joints. Where access from below is not possible, lay a continuous layer of EPS or PIR over the existing floor surface and fix a new floor deck of 18mm tongue-and-groove flooring grade chipboard over it. A 75mm layer of PIR over the existing floor adds 75mm plus the new deck thickness to the finished floor level – account for this at door thresholds, where the door may need to be trimmed or the threshold raised, and when sizing any fitted furniture. The new deck should be secret-nailed or screwed at intervals to prevent any movement or squeaking developing as the cabin moves.
Walls. Fix vertical timber battens at 400mm or 600mm centres to the inner face of the log walls. Leave a deliberate 10-15mm gap between the base of each batten and the wall surface – this gap accommodates the seasonal movement of the timber logs and is not a thermal weakness as the gap is within the insulated zone. Fill between the battens with mineral wool or sheep’s wool batts cut to fit snugly with no compression – compressed mineral wool loses its thermal value. Apply a vapour control membrane over the entire insulated surface, lapping and taping all joints. Finish with tongue-and-groove timber cladding or plasterboard. Do not use rigid foam boards between wall battens as the boards resist movement and can crack the finish surface or the boards themselves as the logs expand and contract seasonally.
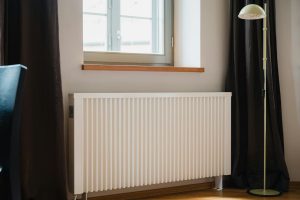
Windows. Single-glazed windows are the thermal weak point of any insulated log cabin and should be upgraded to double-glazed units at the same time as the main insulation work. The improvement in U-value from a single-glazed window (approximately 5.7 W/m2K) to a double-glazed unit (approximately 1.6-2.0 W/m2K) is enormous. Once the walls and roof are insulated, single-glazed windows dominate the heat loss and the condensation pattern of the cabin – condensation will form on the glass even when the rest of the insulation is performing well. Replacement double-glazed frames in timber or uPVC are available from most window suppliers and can be fitted by a competent DIYer in a weekend. Seal around all new window frames with low-expansion foam filler before fitting any internal cladding.
Heating and ventilation
A properly insulated log cabin requires a heating source sized to the space and appropriate to the use pattern. The advantage of good insulation is that the required heat output is modest – a well-insulated cabin of 15-20 square metres requires approximately 1.0-1.5 kW of heat to maintain a comfortable temperature in winter, compared to 3kW or more for an uninsulated equivalent. This means heating options that would be inadequate for an uninsulated cabin become perfectly viable once the building envelope is properly treated.
Electric panel heaters are the simplest solution for a cabin used regularly as an office or workspace. They require only a power supply, are cheap to install, and can be thermostatically controlled to maintain a set temperature with minimal energy use in a well-insulated space. A 1.5kW panel heater with a programmable thermostat in a well-insulated 15m2 cabin is a practical and cost-effective setup for year-round use. The running cost of electric panel heaters is higher than other options, but in a well-insulated space where the actual heat demand is low, the difference in annual running cost compared to infrared is modest.
Infrared heating panels warm objects and surfaces rather than the air, which makes them particularly effective in spaces that are heated intermittently. Unlike a convector heater that must reheat the air every time the cabin cools down, infrared panels warm the walls, floor and furniture directly, and the heat stored in these surfaces radiates back into the space. A ceiling-mounted infrared panel in a well-insulated cabin will make the space feel warm within a few minutes of switching on, even when the air temperature is still rising. Installation is slightly more complex than a panel heater as the panels must be mounted at ceiling level with appropriate clearance, but the result in terms of comfort and response time is noticeably better.
A small wood-burning stove is an option if the cabin has adequate air supply and flue route. A correctly installed small stove (4kW output) in a well-insulated 20m2 cabin is more than adequate heating capacity and produces the most comfortable form of radiant warmth available. The requirements are significant, however: a through-roof insulated liner flue, a hearth that meets the minimum clearance distances from combustibles, and a permanent air vent to supply combustion air. The cost of a correctly installed small stove and flue is substantially higher than electric heating, and the installation must comply with building regulations and be signed off by a Hetas-registered installer. For a cabin used primarily as an occasional retreat or social space rather than a daily office, the investment can be worthwhile, but for a daily workspace the simplicity of electric heating usually wins.
Ventilation is non-negotiable once a cabin is properly insulated. Before insulation, a log cabin breathes through gaps in the structure – draughts that are uncomfortable but that carry moisture out of the building continuously. Once insulated and sealed, that accidental ventilation is gone, and the moisture produced by occupants – breathing, drinks, any cooking or plants – has nowhere to go. The result is rising humidity, condensation on glass and eventually on cold surfaces, and a musty smell as mould begins to develop. The minimum ventilation requirement for an insulated cabin used as an office or studio is a trickle vent in at least one window and an extractor or passive vent positioned to create cross-ventilation. A 100mm extractor fan with humidity control sensor that activates when humidity rises above 70% is an effective low-cost solution that operates automatically and prevents the building up of excess moisture without constantly venting the heated air.
Common problems and how to avoid them
Share on socials: