At a glance
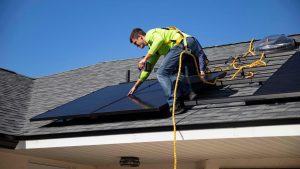
An uninsulated garage door is often the single largest thermal weak point in an attached garage. A standard single-skin steel up-and-over door has almost no thermal resistance – on a cold January night it can be as cold as the external air temperature on its internal face, making it a significant source of radiant cold that makes the entire garage space uncomfortable and expensive to heat. For anyone using an attached garage as a workshop, home gym, utility space or storage area for temperature-sensitive items, insulating the door is one of the highest-return home improvement projects available at the price point involved.
The job is straightforward and requires no specialist tools or skills. A standard double garage door can be fully insulated in an afternoon for well under £100, and the improvement in thermal comfort is noticeable immediately. This guide covers the best materials for the job, which approach works for each door type, the installation process, and the draught-sealing around the frame that is equally important but frequently overlooked.
Why insulate a garage door?
Heat loss from an uninsulated garage happens through three main routes: conduction through the door panel itself, draughts around the edges of the door, and radiation from the cold door surface drawing heat from warmer objects and surfaces nearby. Insulating the door addresses conduction and radiant heat loss directly. Draught sealing around the frame and bottom seal addresses air infiltration. Together, the two interventions can transform the thermal performance of an attached garage from almost entirely uninsulated to a space that retains heat effectively with minimal heating input.
For an attached garage – one that shares a wall with the house – the benefits extend beyond the garage itself. Cold infiltrating through an uninsulated garage and into the adjoining rooms through the shared wall makes those rooms colder and more expensive to heat. Improving the garage’s thermal envelope reduces heat loss from the house as a whole and can make a noticeable difference to heating bills in winter, particularly in homes where the garage shares a wall with a frequently used living space or kitchen.
A well-insulated garage door also helps regulate humidity. The temperature fluctuations in an uninsulated space cause condensation on cold surfaces overnight, which over time causes rust on tools and stored equipment, damp in stored items and deterioration of the garage structure itself. Insulation stabilises the temperature and significantly reduces condensation problems.
Insulation materials compared
PIR rigid foam board – sold under brand names such as Kingspan or Celotex – is the most thermally efficient material available for garage door insulation. It achieves roughly twice the thermal resistance of polystyrene (EPS) board at the same thickness, which matters significantly for a door panel where depth is limited and you cannot add a thick layer without interfering with the door’s operation. A 25mm PIR board glued to a steel sectional or up-and-over door panel delivers a meaningful improvement with minimal added weight. Polystyrene board is a close second and costs less, though at equivalent performance it needs to be thicker. Foil bubble wrap is the cheapest option and the easiest to install with no cutting required, but it provides limited thermal resistance compared to rigid board.
Which method suits your door type
The type of garage door determines which insulation method is practical. Up-and-over steel doors are the simplest to insulate – the inner face is a single flat panel onto which rigid foam board can be glued directly with contact adhesive. Sectional doors with multiple hinged panels require the insulation to be cut and fitted within each panel recess without crossing the hinge lines, otherwise the board will bind and prevent the door from operating. Roller shutter doors cannot take rigid board at all as it cannot roll up – foil bubble wrap stapled or taped to the inner face is the only practical option. Timber side-hinged doors often have a frame structure that allows insulation to be fitted between the internal timber sections.
Step-by-step installation
The method below covers rigid foam board insulation on an up-and-over or sectional steel door – the most common type in UK garages. The same principles apply to timber doors, with the insulation fitted between internal framing members rather than glued directly to a flat face.
Start with the door closed and clean the inner surface thoroughly. Remove any grease, dust or loose paint with a damp cloth and allow to dry completely – the adhesive will not bond reliably to a dirty or greasy surface. Measure the panel or each panel section to be insulated and mark the dimensions on the insulation board. Cut PIR foam board with a sharp knife and a straightedge – score deeply on one face, then snap cleanly along the scored line. Polystyrene cuts best with a serrated knife or a hot wire cutter if available.
Apply contact adhesive to both the back of the insulation board and the inner face of the door panel. Follow the manufacturer’s drying time – most contact adhesives require both surfaces to become touch-dry before bringing them together. Press the board firmly into position and hold for the recommended time. For sectional doors, cut each piece to fit within a single panel section and ensure it does not cross the hinge lines at the panel edges. Avoid adhesive near hinge mechanisms or any moving part of the door.
Check added weight before insulating. Rigid foam board adds weight to the door panel, which affects the balance of spring-counterbalanced doors. For a standard up-and-over door, a single layer of 25mm PIR board across the whole panel adds roughly 5-8kg – usually within the adjustment range of the door springs. If the door becomes noticeably harder to lift after insulating, the spring tension may need adjusting. Most garage door springs have a tension adjustment point – check the door manufacturer’s guidance.
Draught sealing the frame and edges
Draught infiltration around the edges of a garage door is often responsible for as much heat loss as the uninsulated panel itself, yet it is the element most frequently left undone. A door with insulated panels but no edge sealing will still allow a significant volume of cold air into the garage through the gaps around the frame.
The bottom of the door is where the most cold air enters. Most garage doors have a rubber or PVC bottom seal – a strip of flexible material fixed to the lowest edge of the door that compresses against the floor when the door is closed. These seals perish and harden over time, losing their ability to compress and seal effectively. Replacing a worn bottom seal is a simple job – the old seal slides or unscrews from a retaining channel, the new one slides in, and the result is an immediate improvement in air tightness. Check the seal by sliding a piece of paper under the closed door at several points – if it slides freely, the seal has failed.
The sides and top of the door frame should be sealed with self-adhesive foam draught strip or brush strip, depending on the gap width. Foam strip compresses to seal gaps up to 5mm effectively. For larger or irregular gaps, a brush strip – a flexible pile of fine bristles in a plastic carrier – accommodates variations in gap width better than foam. Pay particular attention to the corners where the side jambs meet the header, as these are often the largest gaps and most easily overlooked.
Common mistakes to avoid
Share on socials: