At a glance
Artificial grass has improved dramatically in quality over the past decade and a well-installed product in a UK garden is increasingly difficult to distinguish from natural turf at a glance. The market ranges from cheap, thin products that look obviously synthetic and deteriorate quickly to premium pile grass that moves naturally in the wind and holds up well over 10-15 years of use. The product you choose matters, but the installation matters even more – poorly prepared ground causes drainage problems, weed growth through the surface and an uneven finish that no quality of grass can disguise.
This guide covers DIY installation for a standard rectangular or simple-shaped garden on a soil base. Complex shapes with multiple joins, curved edges or installations around garden features such as raised beds, trees and pergola posts are better handled by a professional installer – joins in artificial grass are the most visible point of failure and require practice, specialist tape and the right tools to achieve an invisible result. Cutting curves accurately also requires specialist equipment and a steady hand. For a straightforward rectangular plot with straight edges and no joins required, however, a competent DIYer with the right preparation can achieve a professional-looking finish over a single weekend.
Choosing the right artificial grass
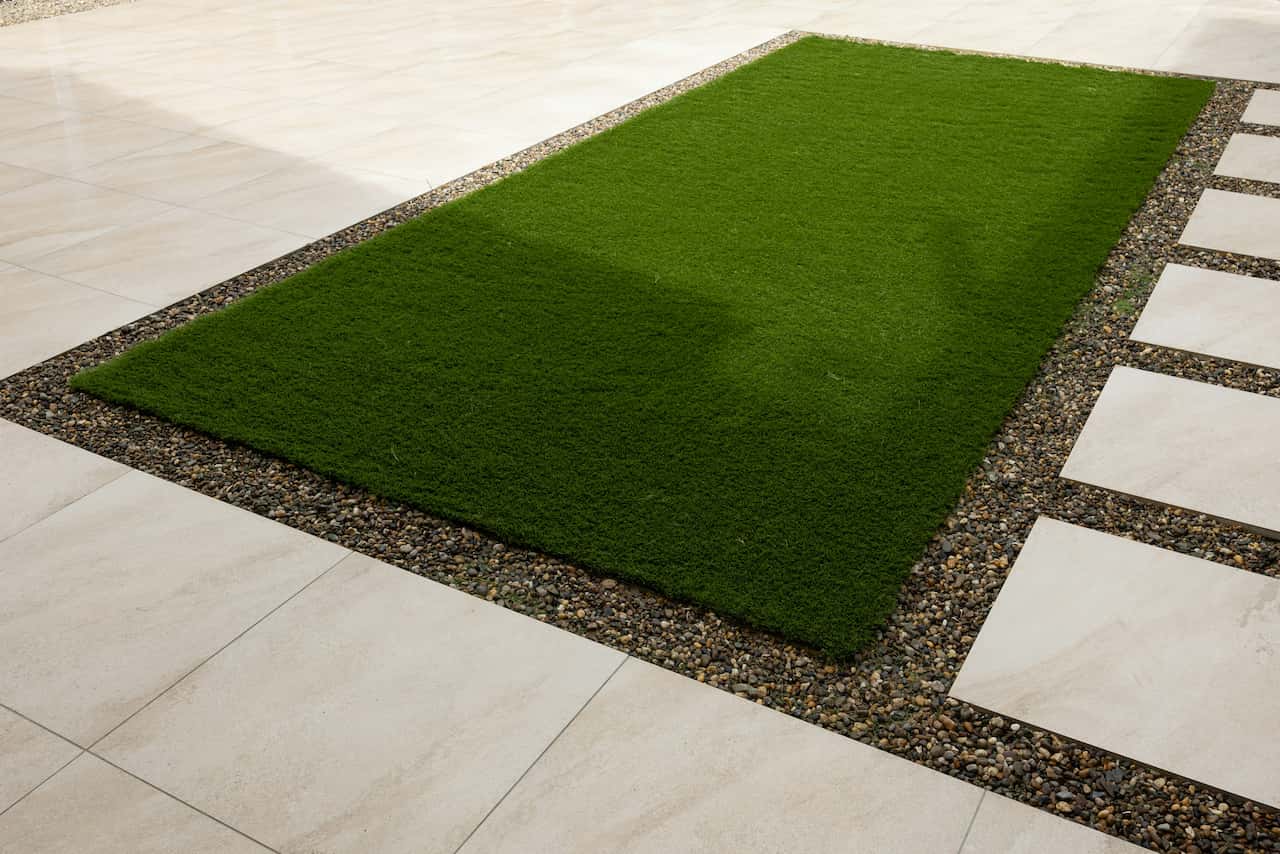
For a UK family garden, a 30-35mm pile depth in a multi-tone green – mixing two or three shades of green with occasional brown fibres to mimic dead grass realistically – produces the most natural-looking result. Avoid single-colour bright green products, which read as obviously synthetic from any distance and age poorly as the colour fades unevenly over time. UV stabilisation is essential in UK conditions; check that the product carries a UV stability guarantee of at least 8-10 years from the manufacturer, not the retailer. A latex-backed product is cheaper upfront but absorbs moisture and odours over time, particularly in gardens used by dogs. A polyurethane (PU) backed grass is more expensive initially but drains freely, resists odour absorption and performs significantly better over its operational life.
Preparation and sub-base
Preparation is where most DIY artificial grass installations succeed or fail. Inadequate sub-base preparation leads to an uneven surface, poor drainage, weed growth through the grass over time and premature deterioration of the grass backing as moisture becomes trapped below. It cannot be rushed and it cannot be skipped. The correct build-up for a domestic garden installed on soil consists of a weed membrane laid directly on the compacted subsoil, followed by a compacted layer of MOT Type 1 crushed aggregate, topped with a levelling course of sharp sand or grano dust. Each layer serves a specific function – weed suppression, structural stability and drainage, and final levelling respectively – and none of them is optional or interchangeable with a cheaper shortcut.
Excavate all existing vegetation and topsoil to a depth of approximately 75-100mm from the desired finished surface level. This depth accommodates all the sub-base layers below and leaves the finished surface at a natural height relative to surrounding paving or borders. Compact the exposed subsoil firmly with a plate compactor or heavy hand tamper, working across the entire area in both directions to ensure an even, stable base. Any soft spots will sink over time and create dips in the finished surface that will be visible and irritating to walk on. Install edging boards – typically treated timber battens fixed with wooden stakes – around the perimeter of the area to contain the sub-base and provide a secure fixing point for the artificial grass along all boundaries.
Lay a permeable weed control membrane directly over the compacted subsoil before adding any aggregate. This prevents deep-rooted weeds from growing up through the sub-base over time and separates the aggregate from the soil below. Then lay 50mm of compacted MOT Type 1 crushed aggregate as the primary sub-base layer. Compact this thoroughly with a plate compactor, working across the surface in both directions. Top with 25mm of sharp sand or grano dust, levelled and screeded to a perfectly flat surface. Any imperfection in this levelling course will telegraph through the finished grass and be visible underfoot.
Drainage is critical in UK conditions. The UK receives significant rainfall year-round and poor drainage under artificial grass creates a waterlogged sub-base that smells, supports moss and algae growth, and deteriorates the grass backing prematurely. MOT Type 1 aggregate provides good natural drainage – never use standard soil or topsoil as a sub-base. If your garden already has poor natural drainage, granite or limestone chippings in place of MOT Type 1 offer superior water management.
Laying the grass
Allow the roll of artificial grass to acclimatise by unrolling it on a flat surface – or loosely in the garden itself – for at least two hours before fitting, particularly in cold weather below 10°C. Cold grass is stiff, resists lying flat and is significantly more difficult to cut and position accurately. Warm grass is pliable, lies flat more readily and produces cleaner, more consistent cuts at the edges. In very cold conditions, bringing the roll indoors overnight before installation is worth the effort.
Position the grass with the pile direction running away from the main viewing angle – the direction the fibres lean determines how the colour reads and you want the grass to look its darkest and most natural from the most-seen viewpoint, which is typically from the house or rear doors looking out into the garden. An easy way to check pile direction is to run your hand along the surface in each direction – against the pile the surface resists and looks lighter; with the pile it lies flat and reads darker. Roll the grass out over the prepared surface and trim roughly to shape with a sharp utility knife, leaving a 50mm overlap on all edges for final trimming. Cut from the back of the grass where possible for cleaner results. Change the blade frequently; a sharp blade makes a very significant difference to cut quality on the dense woven backing of artificial grass, and a blade that feels fine on other materials may be too dull for a clean artificial grass cut.
Let the grass relax before final fixing. After positioning, leave the grass for 30-60 minutes before fixing it down. Artificial grass has memory from being rolled and needs time to relax completely flat. Fixing it while it still has tension from the roll can cause lifting and bubbling at the edges after the tension releases over the following days.
Finishing and fixing
Fix the perimeter of the grass to the edging boards with galvanised nails or staples at 150mm intervals, fixing through the backing rather than through the pile itself. Work around the entire perimeter methodically, pulling the grass gently taut as you go without overstretching it – overstretching creates tension that causes the grass to pull away from the fixings over time as the material relaxes. Trim the final edge flush with the edging board using a sharp utility knife for a clean finish at each boundary. Where the grass meets an adjacent hard surface such as paving or decking, any residual pile at the very edge can be trimmed back neatly with sharp scissors for a precise, professional finish.
For areas where two pieces of artificial grass need to be joined, use purpose-made artificial grass joining tape and the appropriate adhesive, applied to the sub-base beneath the join line. Fold both pieces back, apply the tape centrally beneath the join, apply adhesive, then fold the two pieces back down onto the tape – one at a time – butting them together precisely with the pile directions matching exactly. Press firmly and weight down with heavy objects until the adhesive cures fully. The most common join errors are mismatching pile direction, which creates a visible colour difference, and leaving a gap or ridge between pieces – both are extremely difficult to correct once the adhesive has set, so take time to get the alignment right before committing to the press.
Brush kiln-dried silica sand into the pile at a rate of approximately 4-5kg per square metre for a 30mm pile, applied in two or three passes rather than all at once. Using a seed spreader ensures even distribution before brushing in. This infill supports the fibres upright, adds weight to prevent lifting and improves drainage through the backing. Apply in stages, brushing in thoroughly with a stiff broom or mechanical brush between each pass. The correct depth of infill leaves approximately one-third of the pile height exposed and free-standing above the sand level – visible as a clear distinction between the filled base and the upright, free-moving fibre tips above it. Under-filling leaves fibres that flatten under foot traffic; over-filling buries the fibres and gives the surface a sandy, unnatural appearance.
Maintenance
Artificial grass requires minimal but regular maintenance to stay looking its best. Brush the pile with a stiff broom or a specialist artificial grass brush every 4-6 weeks – more frequently in high-use areas such as pathways and play zones – to keep the fibres upright and prevent compaction. Fibres that are allowed to mat down and stay matted become increasingly difficult to restore and reduce the lifespan of the surface. Remove fallen leaves promptly through autumn and winter – a leaf blower on low power works well without disturbing the silica sand infill. Leaving a wet leaf mat on artificial grass creates the same conditions as on natural turf: excluded light, retained moisture and ideal conditions for moss and algae growth on the backing. Rinse the surface with a hose periodically to remove dust, pollen, bird droppings and any residue from pets or garden furniture.
Spot-clean any stains promptly with warm water and a mild, pH-neutral detergent. Most common garden stains – bird droppings, food, drink – come off without issue if addressed before they dry and bond to the fibres. Oil-based stains from barbecues or garden machinery require a specialist artificial grass cleaning product; applying a standard household degreaser risks damaging the fibres and backing. Avoid using bleach or any strongly alkaline or acidic products, which break down the synthetic fibres and backing material significantly faster than normal wear. A well-maintained artificial lawn installed on a proper sub-base requires no other regular treatment and should provide 10-15 years of comfortable service before the fibres begin to show significant wear at the base of the pile. For comparison, a natural lawn requires weekly mowing, regular feeding and ongoing repair through every growing season – the reduced maintenance commitment is artificial grass’s most genuine practical advantage for many households.
Share on socials: