At a glance
Installing a shower is one of those jobs that looks straightforward until the wall comes off. Most of the physical work, including tiling, fitting the tray and connecting the waste, is genuinely within reach of a confident DIYer. But there are points in the process where the work crosses into territory with legal obligations attached, and understanding where those lines fall before you start saves a lot of expensive backtracking later.
The biggest one is electricity. If you are fitting an electric shower, the connection to the mains supply is notifiable work under Part P of the Building Regulations. That means it either has to be done by a registered electrician who can self-certify the work, or it has to be notified to your local authority building control before it is carried out. An unpermitted electrical installation creates problems when you sell the house and potential safety issues in the meantime. Get a Part P registered electrician to handle the final connection and they will issue a completion certificate. The plumbing side is different. In England and Wales, the plumbing connections on a shower do not require notification, so a competent DIYer can legally connect the water supply and waste.
What you’ll need
Types of shower and what each requires
The shower type you choose shapes the entire installation, so it is worth understanding the differences before committing to anything. Each type has different requirements for hot water, pressure, and electrical supply.
Power showers and combi boilers do not mix. Adding a pump to a mains-pressure supply creates serious overpressure risks. If you have a combi boiler, a power shower is not compatible with your system. Check your system type before purchasing.
Preparing the space
The work before the shower goes in is where most installation projects either succeed or fail. Good preparation is the difference between a job that holds up for fifteen years and one that starts showing problems inside two.
Waterproofing is the critical step. Tiles alone are not waterproof. Grout is not waterproof. The substrate behind and beneath the tiles needs to be properly tanked before anything goes up. In a shower enclosure, the walls within the wetted zone should be either cement board or a purpose-made tile backer board. Standard plasterboard, including moisture-resistant variants, is not suitable for the walls directly inside a shower enclosure. These boards fix to the wall studs or to the existing wall surface and provide a stable, non-absorbent substrate that does not swell when wetted.
Before any tiling starts, all board joints and the junction between the wall boards and the tray or floor should be filled with waterproofing tape and liquid waterproofing membrane. This is applied with a brush in two coats, paying particular attention to the corners where wall meets floor. I have seen beautiful tiling fail within a year because this step was rushed or skipped entirely. The membrane is inexpensive and takes an hour to apply properly.
The floor in a wet room or walk-in shower needs a properly waterproofed screed or a pre-formed wet room former. Purpose-made wet room trays with an integrated waste position are the most reliable option for most installations. They come pre-formed with the drainage gradient already built in, removing the need to create a fall in the screed by hand.
The waste connection needs to be accessible for clearing blockages. A trap that is completely buried in a concrete screed with no access panel is a future problem. If the shower is going on a solid floor and the waste connection needs to run along the floor rather than straight down, plan the routing before any tiles go in.
Check trap height before committing to a low-profile tray. Low-profile trays have very little clearance below the waste outlet. Some waste traps are too tall to fit without lowering the floor. Measure the available depth before purchasing the tray, not after.
Fitting the tray
Shower trays are either low-profile acrylic, stone resin, or ceramic. Acrylic is the most common and easiest to work with. Stone resin trays are heavier, more rigid, and give a better underfoot feel but require more careful support. Low-profile acrylic trays flex underfoot if not properly supported across their full base, and that movement works the silicone joint loose and eventually cracks the tray itself. If the tray does not come with a cradle, bed it on mortar or use proprietary foam feet to support it fully.
The waste connection is made before the tray is siliconed down, because once the tray is in and the enclosure is fitted you cannot reach it. Connect the trap, run the waste pipe to the soil stack or gulley, and test the connection before committing to the final position. Then set the tray level in both directions using a long spirit level. A shower tray that is not level either pools water in one corner or creates an uneven flow to the waste. Pack under the feet or cradle until it is exactly right, then check again after loading.
The joint between the tray and the tiled wall is the most vulnerable point in the whole installation. Seal around the perimeter with mould-resistant silicone once the tray is positioned. This joint must be siliconed, not grouted. Silicone flexes with any slight movement between tray and wall. Grout does not. A cracked grout joint at the base of the shower wall is how water gets into the floor structure. Leave the silicone to cure for the time stated on the packaging before using the shower.
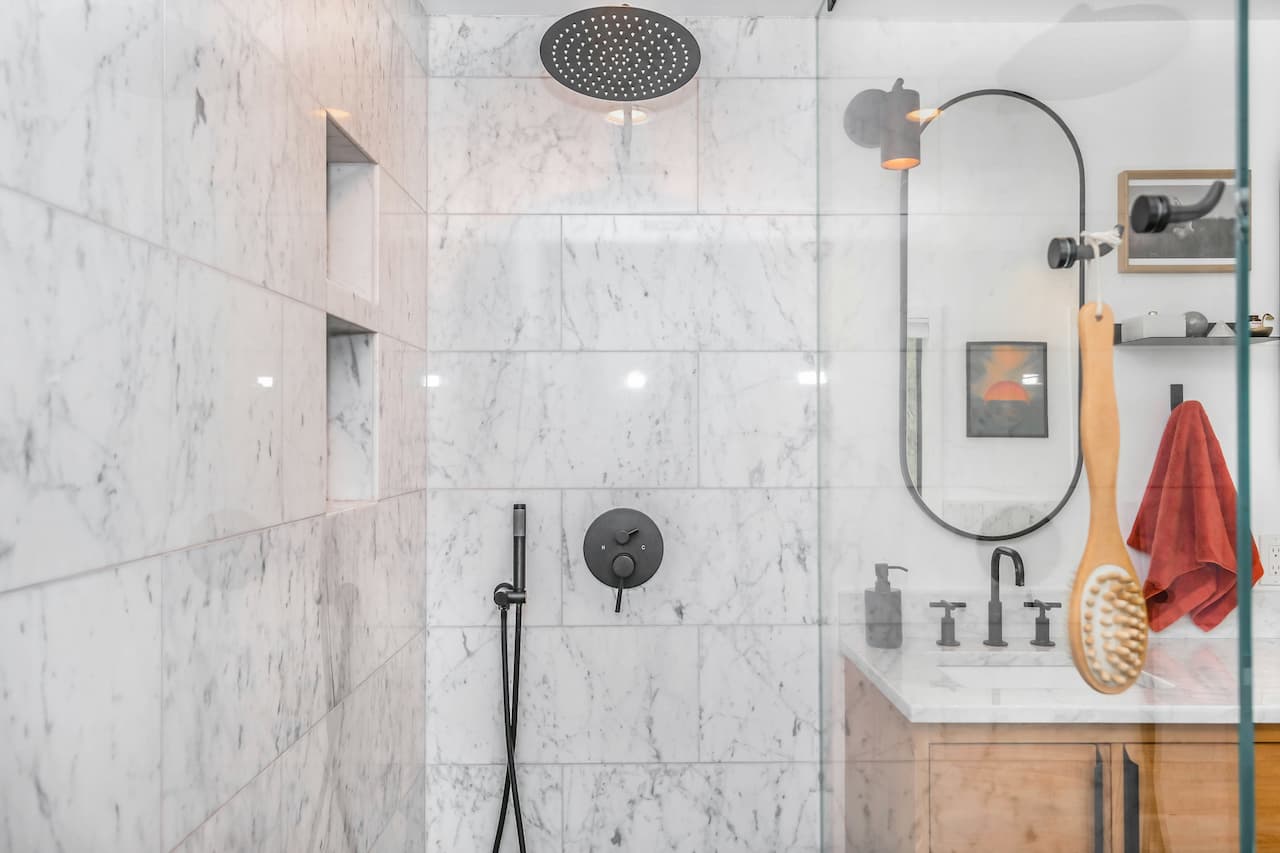
Fitting the enclosure or tiling the walls
A framed or semi-frameless enclosure is the simplest option for most shower trays. The frame goes up against tiled walls, the panels are glazed into it, and the door hangs on hinges or a pivot mechanism. Most enclosures come with adjustable channels that compensate for walls that are not perfectly plumb. Check both walls with a level before you start and use the adjustment range in the channel accordingly.
Fix the wall channels to the tiled wall using the fixings supplied. Drill into tiles carefully to avoid cracking them. A masonry bit at low speed with gentle pressure usually works, but a tile drill bit is safer for porcelain or ceramic. Use rawlplugs appropriate for the wall material behind the tile. On a stud wall, fix into the studs where possible rather than relying on the plasterboard alone.
The door seal at the base of the enclosure and the magnetic seals on the door edges are the parts that fail first. When fitting the enclosure, ensure these seals are correctly positioned and making full contact. A shower door that drips water out at the base is almost always a seal alignment issue rather than a leak in the structure.
For a wet room or tiled-wall enclosure without a framed screen, tile from the top of the tray upwards using a flexible tile adhesive rated for wet areas. Once the tiling is done, grout all joints except the perimeter at floor level and any internal corners. Those get silicone, not grout.
Connecting the water supply
Connecting a shower valve to the existing hot and cold supply involves tapping into the relevant pipes and running new feeds to the valve position. Isolate the relevant pipes before making any connections. Most domestic water systems have isolating valves on branch pipes, or you can turn off at the main stop valve. Drain back the section you are working on before cutting into any pipe.
Thermostatic shower valves connect to hot and cold supplies. The hot connection is typically on the left when facing the valve, the cold on the right, but always check the manufacturer’s documentation as this varies. Use braided flexible hoses for the final connections between the valve and the wall outlets rather than rigid copper into the valve body directly. This allows for some adjustment and makes the valve easier to service later.
Exposed shower valves mount on the wall with the pipe connections behind. Concealed valves sit flush with the wall surface. Concealed valves require access for servicing, either through a removable tile panel or through a recess accessible from an adjacent cupboard. Think about this before tiling over everything. Check all connections for leaks before tiling. Turn the water back on slowly and inspect every joint. A slow drip that you cannot see behind tiles is a significant problem months later.
Connecting an electric shower
An electric shower needs its own dedicated circuit back to the consumer unit. The circuit size depends on the shower’s kilowatt rating and the specific cable run length. This calculation must be done by the electrician installing the circuit, who will specify the correct cable cross-section and protective device for the installation.
Installing the shower head and controls
The shower head, hose, and handset connect to the valve via the outlet ports. Most valves have a standard connection size that accepts fittings from different manufacturers. The riser rail mounts to the wall and the handset slides into a bracket on the rail. If you are fitting a ceiling-mounted fixed head, the supply pipe runs up through the wall or ceiling to the head position. The pipe needs to be secured to avoid vibration noise when the shower is running.
Thermostatic valves have a temperature limiter that prevents the maximum temperature being set too high. Most thermostatic valves come with a safety stop set at 38 degrees Celsius, which prevents accidental scalding. This is particularly relevant where children or elderly people use the shower. The stop can usually be overridden by pressing or disengaging a clip on the temperature dial. Check the manufacturer’s instructions for the specific valve. Set the limiter appropriately for the household before completing the installation.
Common problems and how to fix them
Most shower problems follow recognisable patterns. Knowing what causes them makes diagnosis and repair straightforward.
Share on socials: